Swami Photography
Portfolio
expand_more
Landscapes
Portraits
Bollywood
Tennis
Blog
Tips
Podcast
About
All
Composition
Lighting
DSLR
Storytelling
Theory
Basics
Focus
Depth
Posing
Swami Photography
Portfolio
Landscapes
Portraits
Bollywood
Tennis
Blog
Tips
Podcast
About
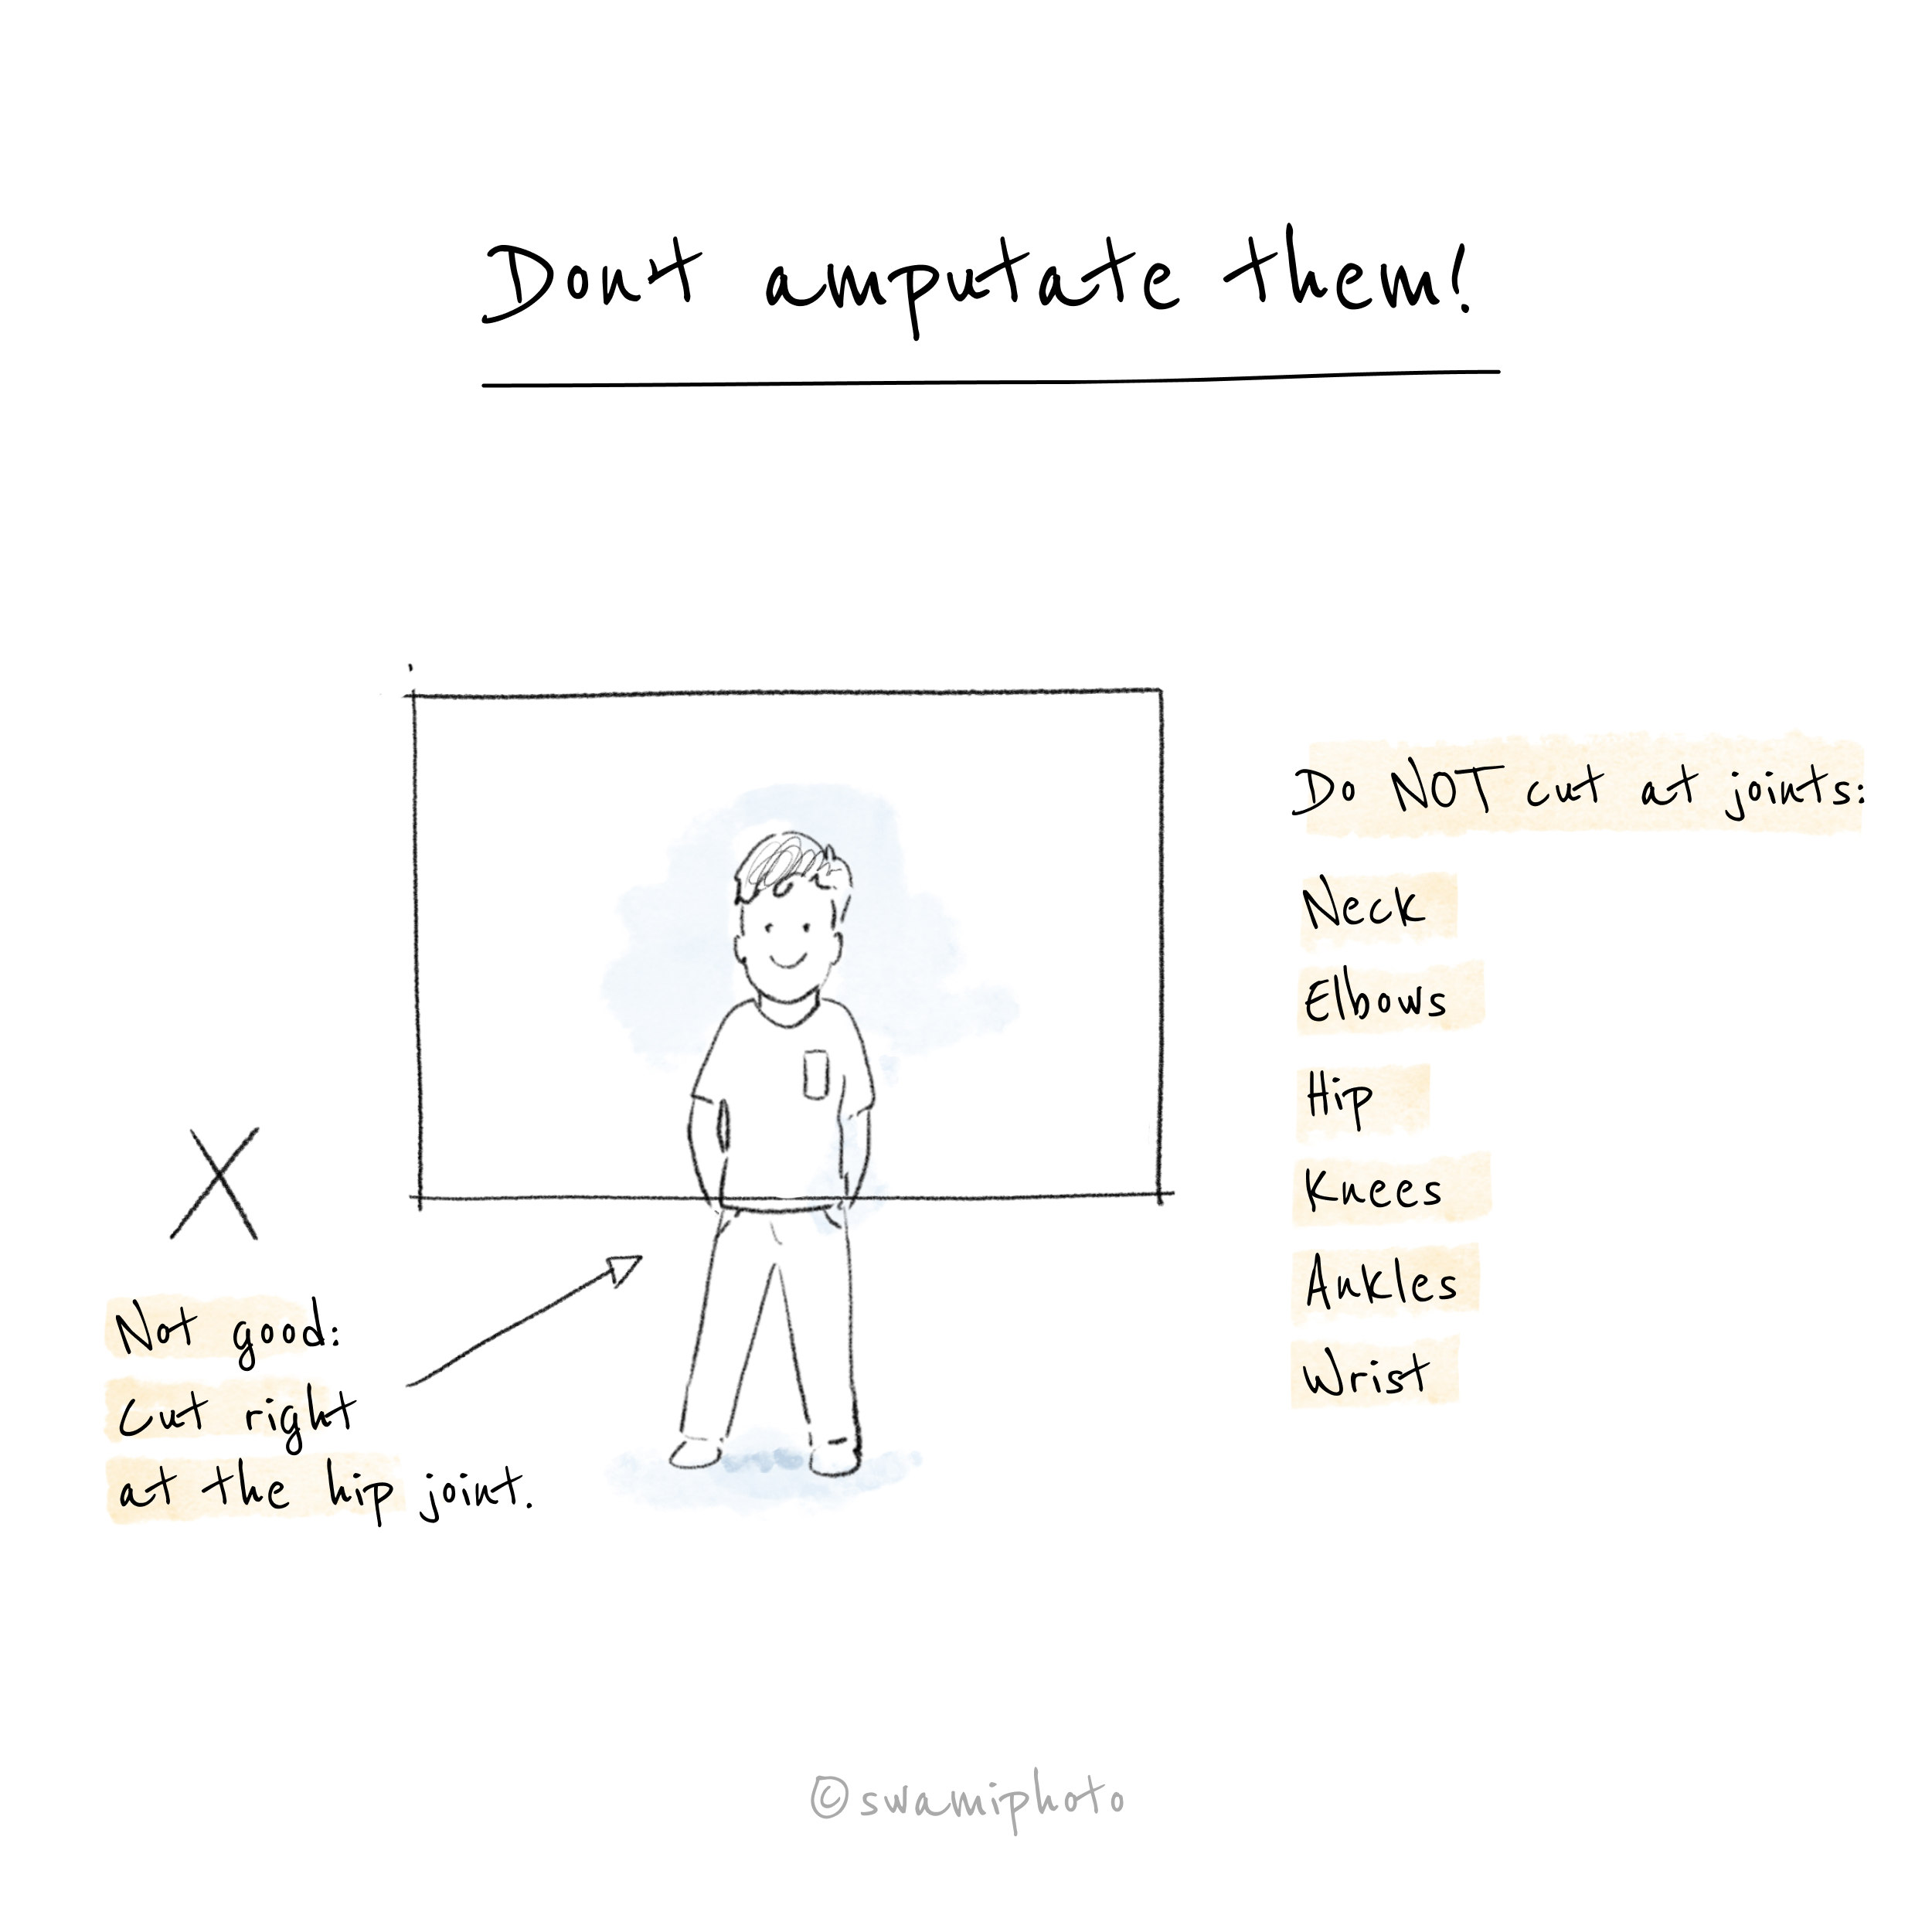
Don't Amputate Them!
When you frame your shot, make sure you're not cutting right at a joint. It will make them look amputated. Instead, cut in between the joints.
Don't Chop Off Their Feet!
Before you hit the shutter button, make sure their feet are inside the frame. If not just move back a bit.
Fine the Beauty Angle
Beauty may be in the eye of the beholder, but usually, there's one angle the model looks best.
Showcase Symmetry
Photographers love shooting symmetry because, well, it's fascinating, but also because it brings harmony and balance to the image.
Seek Negative Space
It's OK to have empty space in your picture. Just as a single art piece in a museum often takes up a whole wall, having negative space in your photo brings attention and importance to your subject.
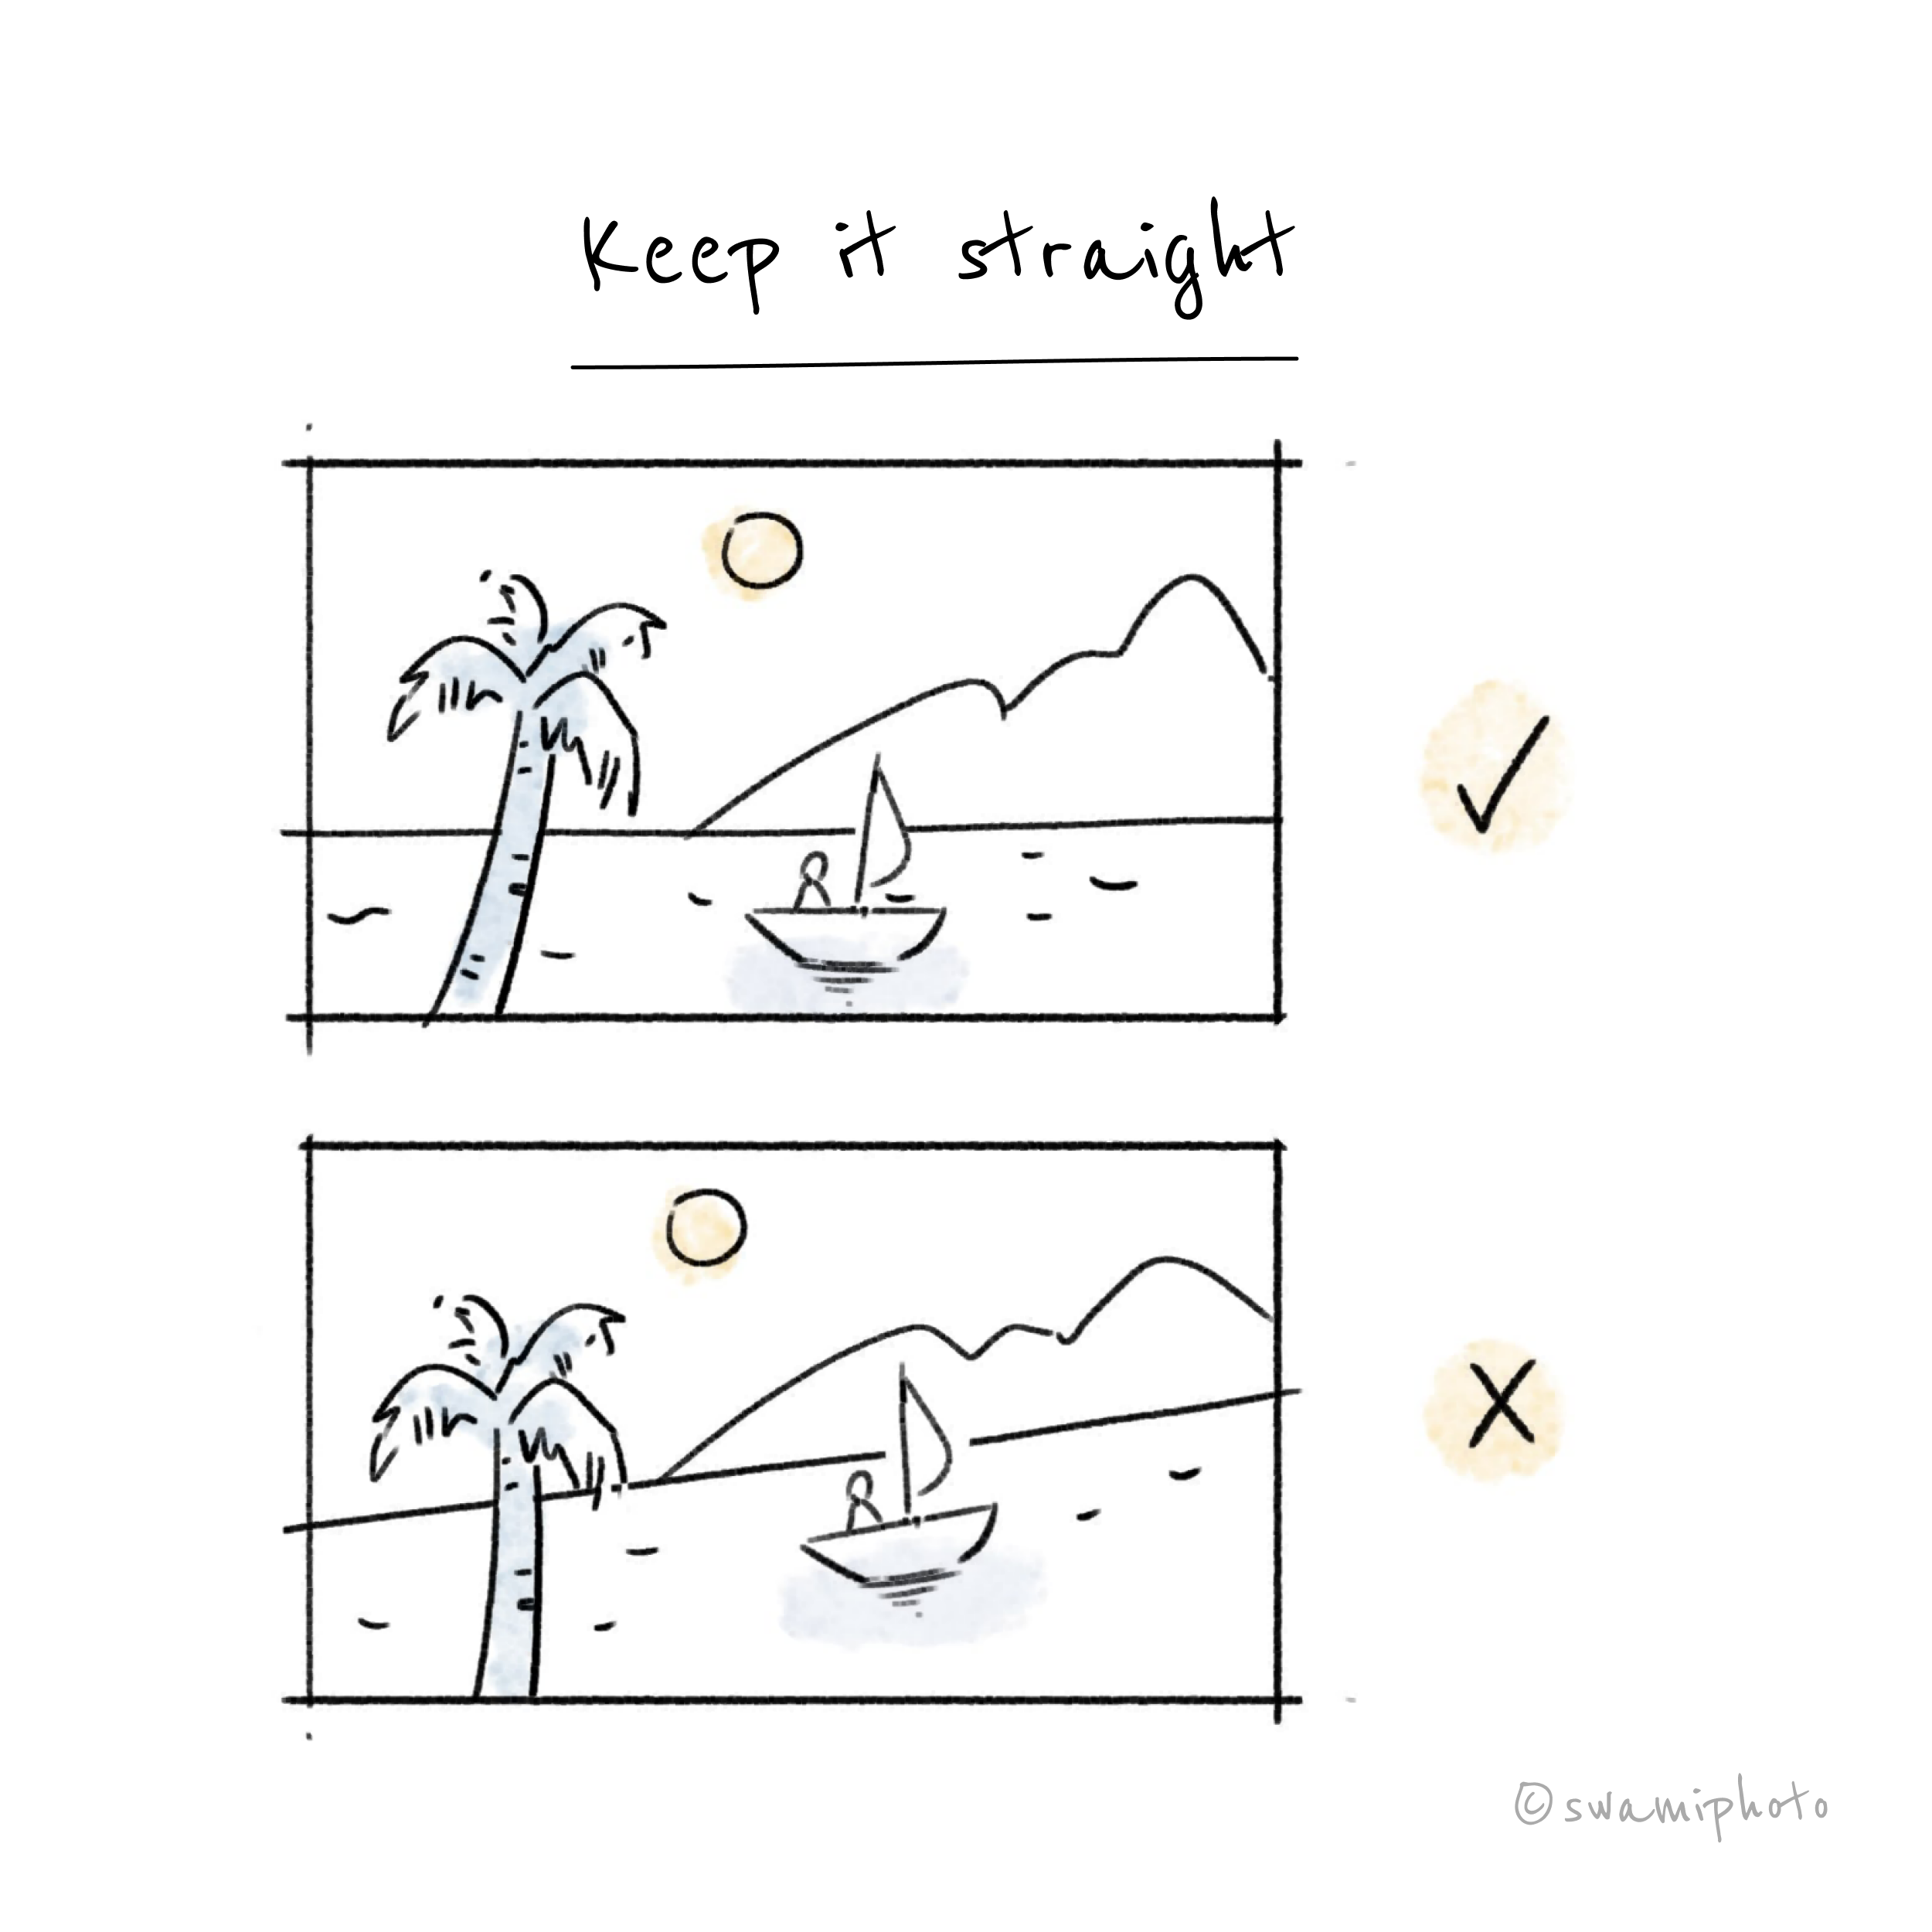
Keep it Straight
Keep your photos straight, especially landscapes, and especially if the horizon is visible.
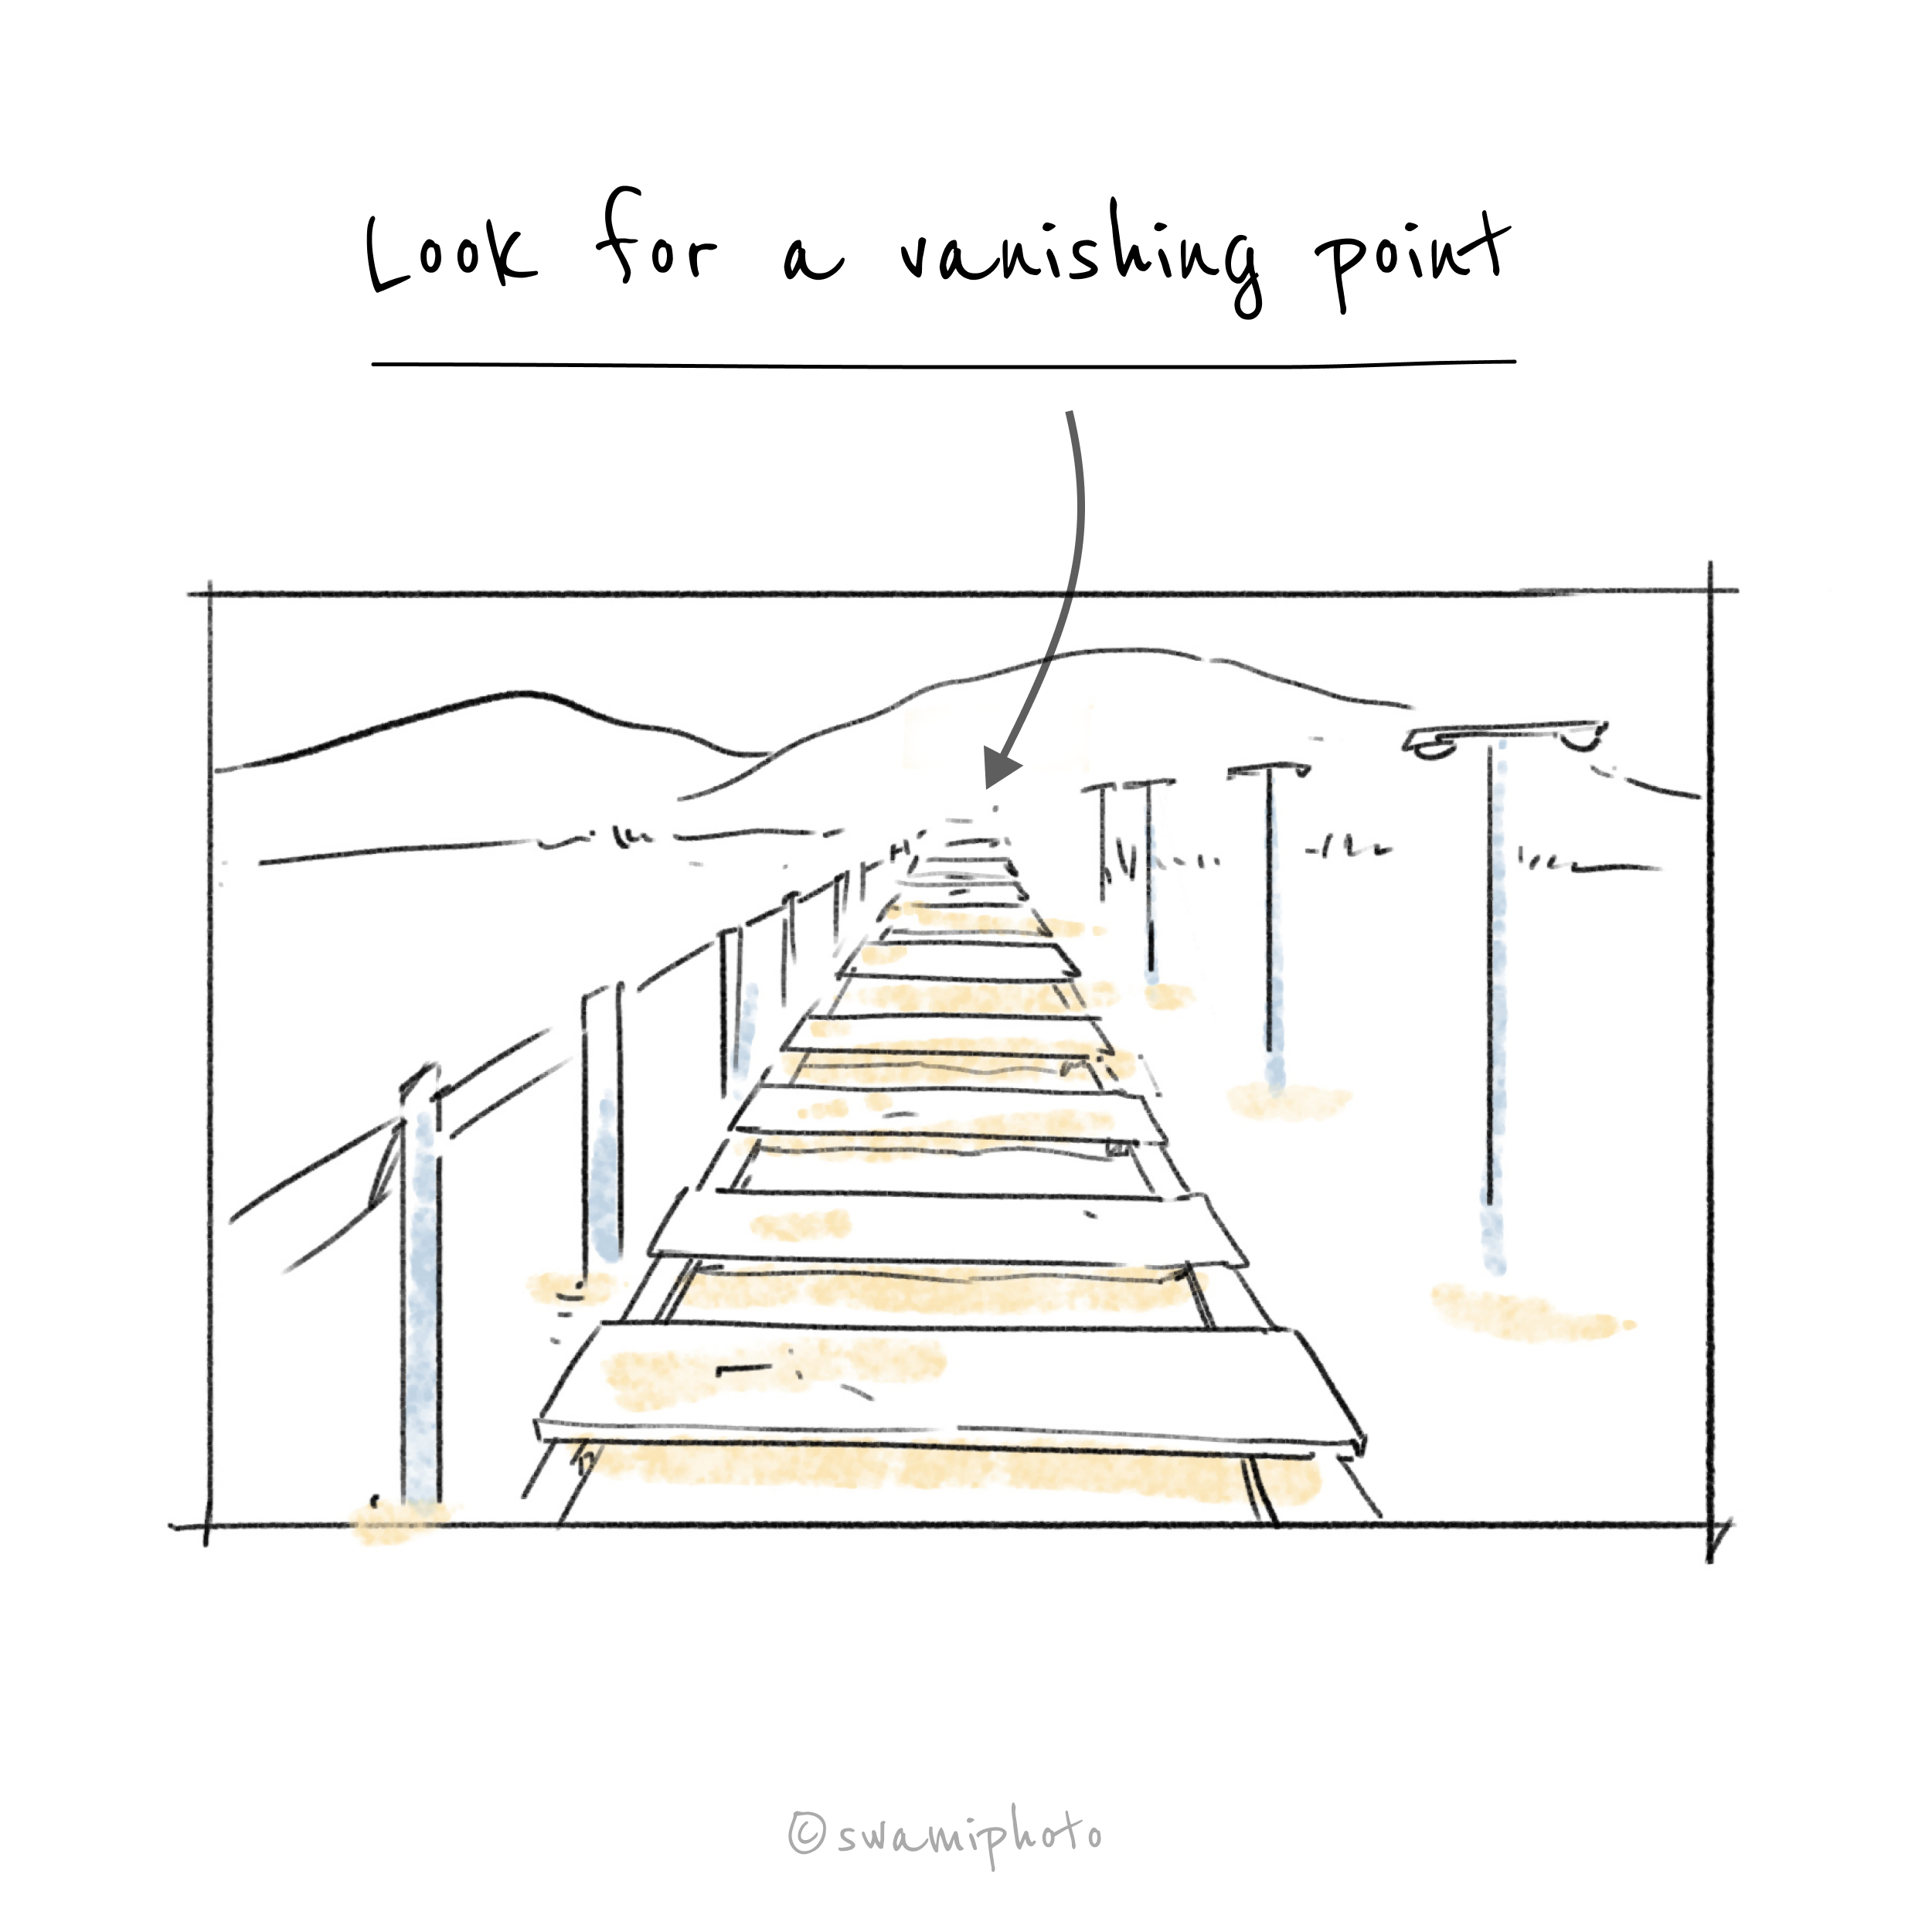
Look for a Vanishing Point
A fantastic way to convey depth in your scene is to show a "1-point perspective" where parallel lines appear to meet and vanish at the horizon.
Find a Natural Frame
Look for something in your foreground to "frame" your subject. It adds character to your photo and conveys depth in the scene.
Look for Lines
Including a line in your photo can create a sense of depth--especially a line that starts from the edge of the frame and goes into the scene.
Center the Horizon for Reflections
When shooting reflections, position the horizon at the center to emphasize the symmetry--don't use the rule of thirds here for the horizon.
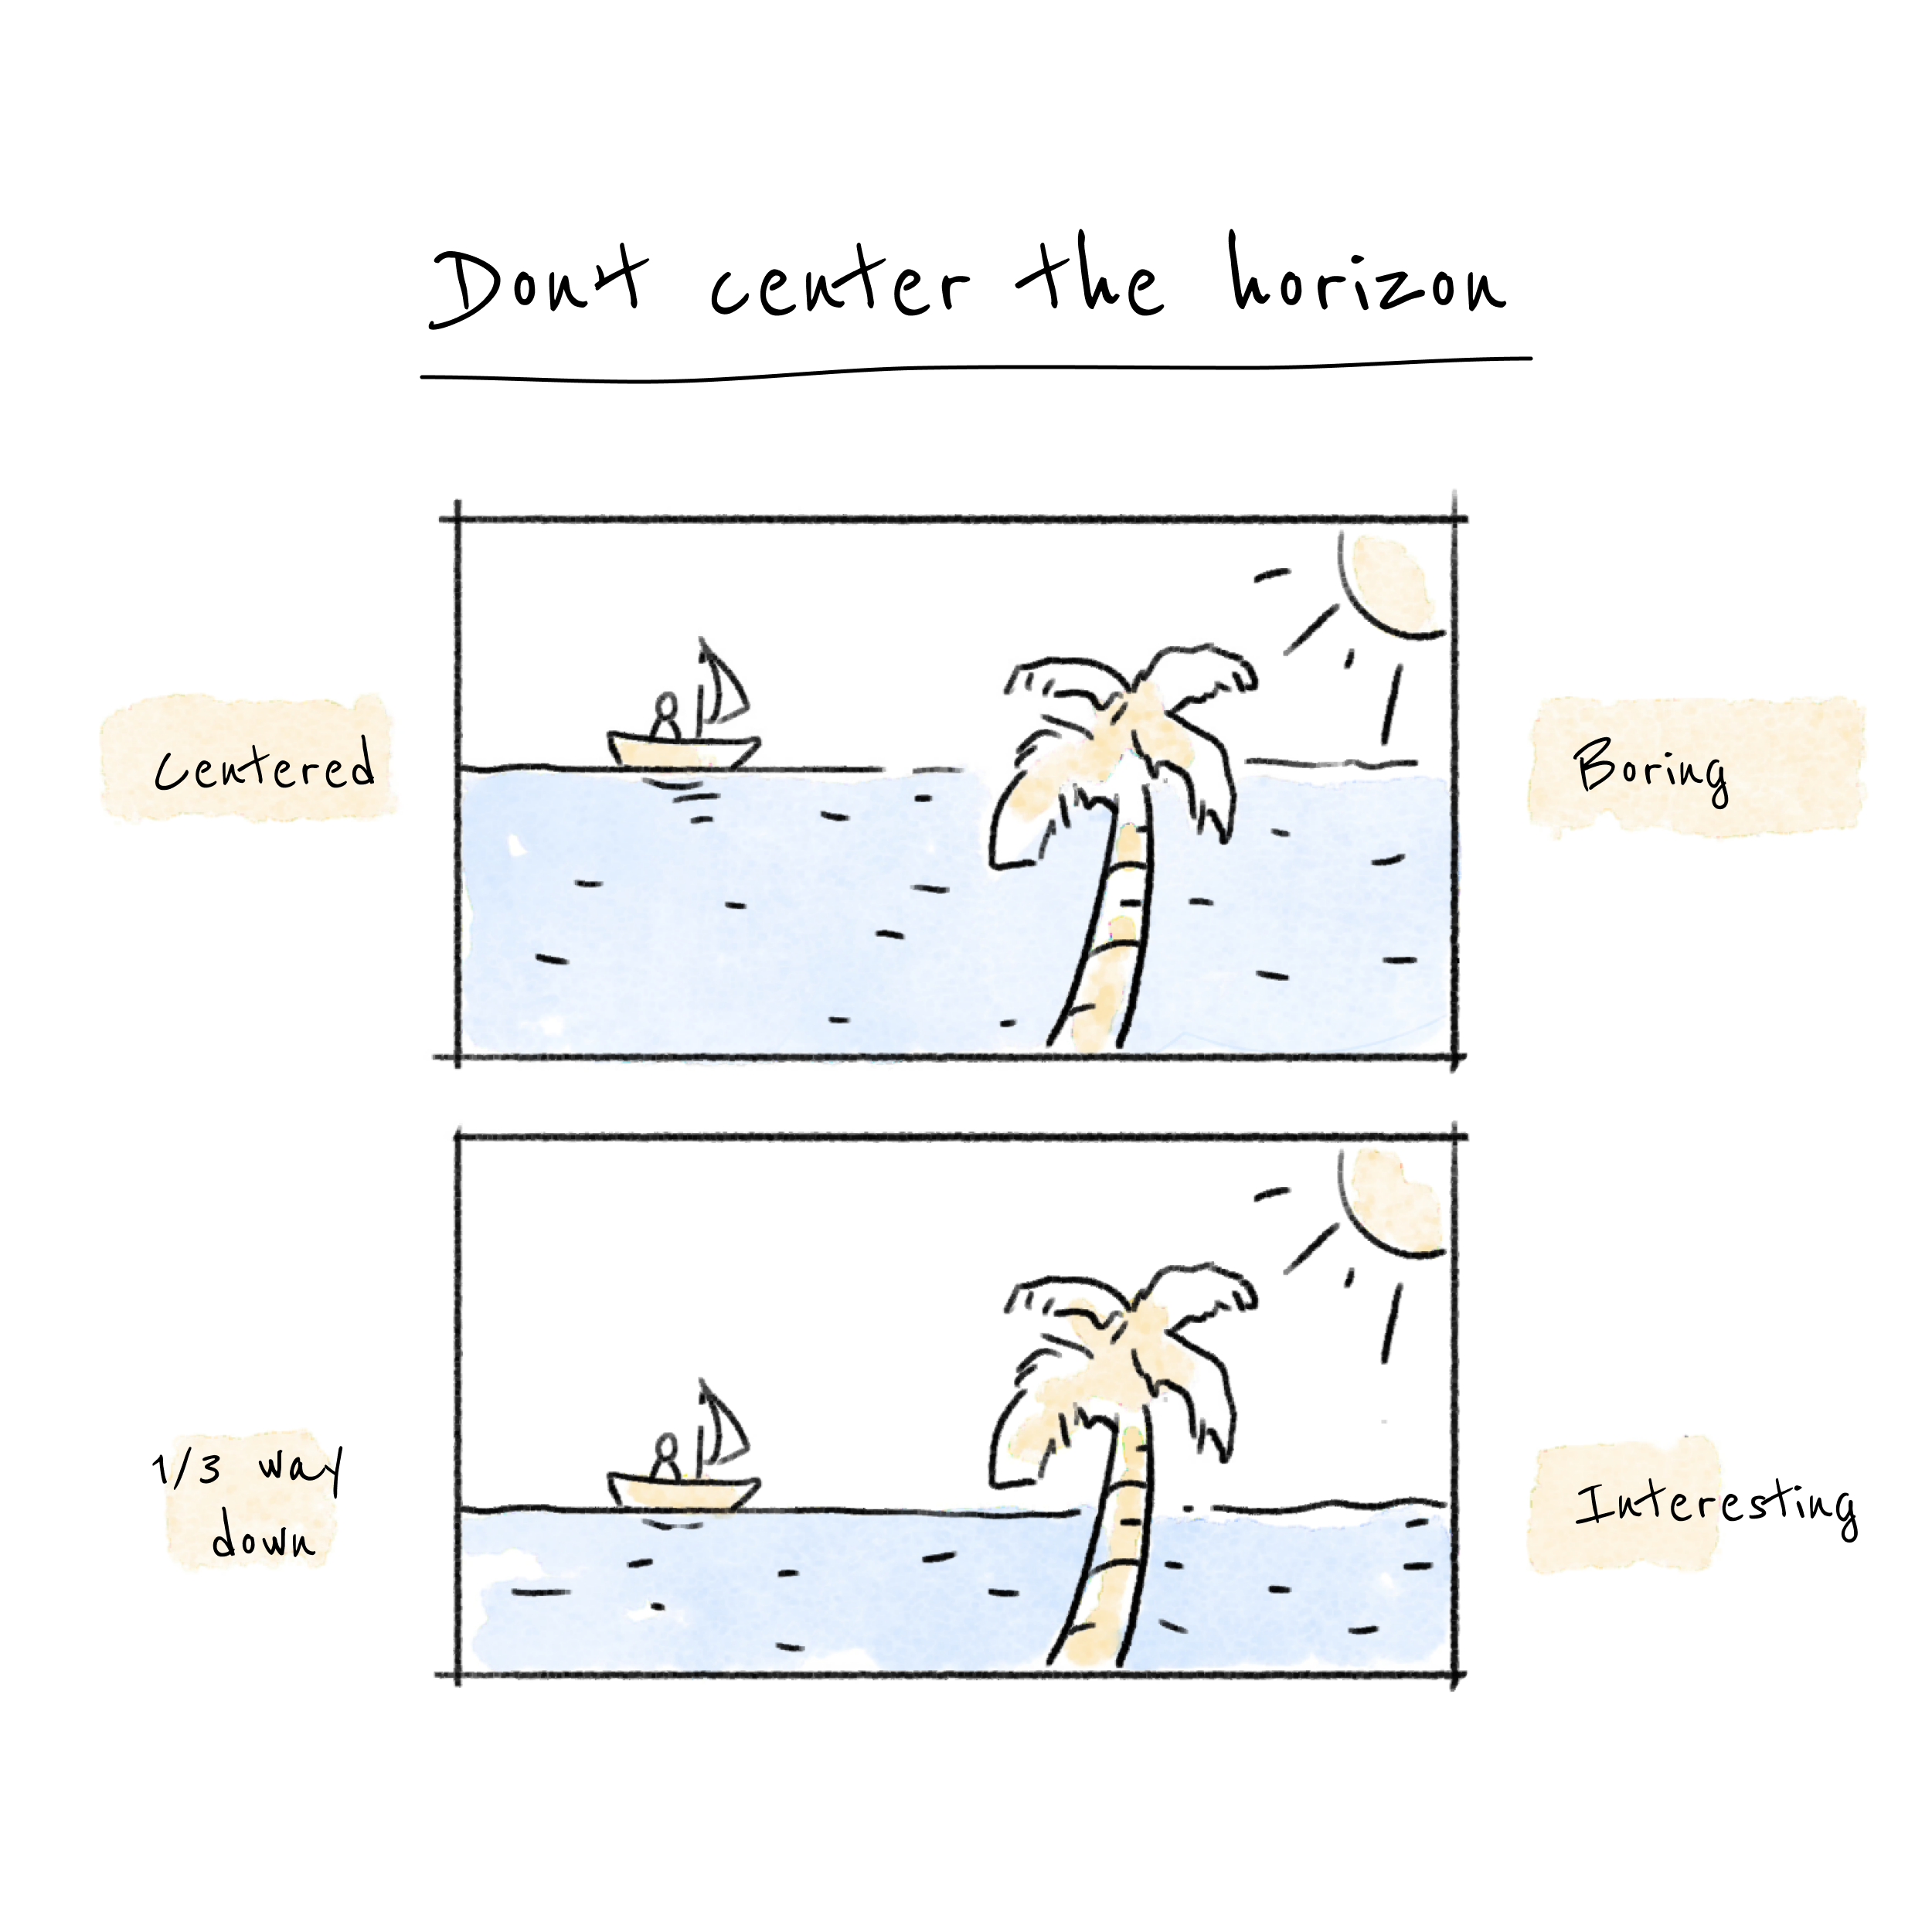
Don't Center the Horizon
For a more interesting look, position the horizon (where the sky meets the ground) one-third way up or down rather than at the center.
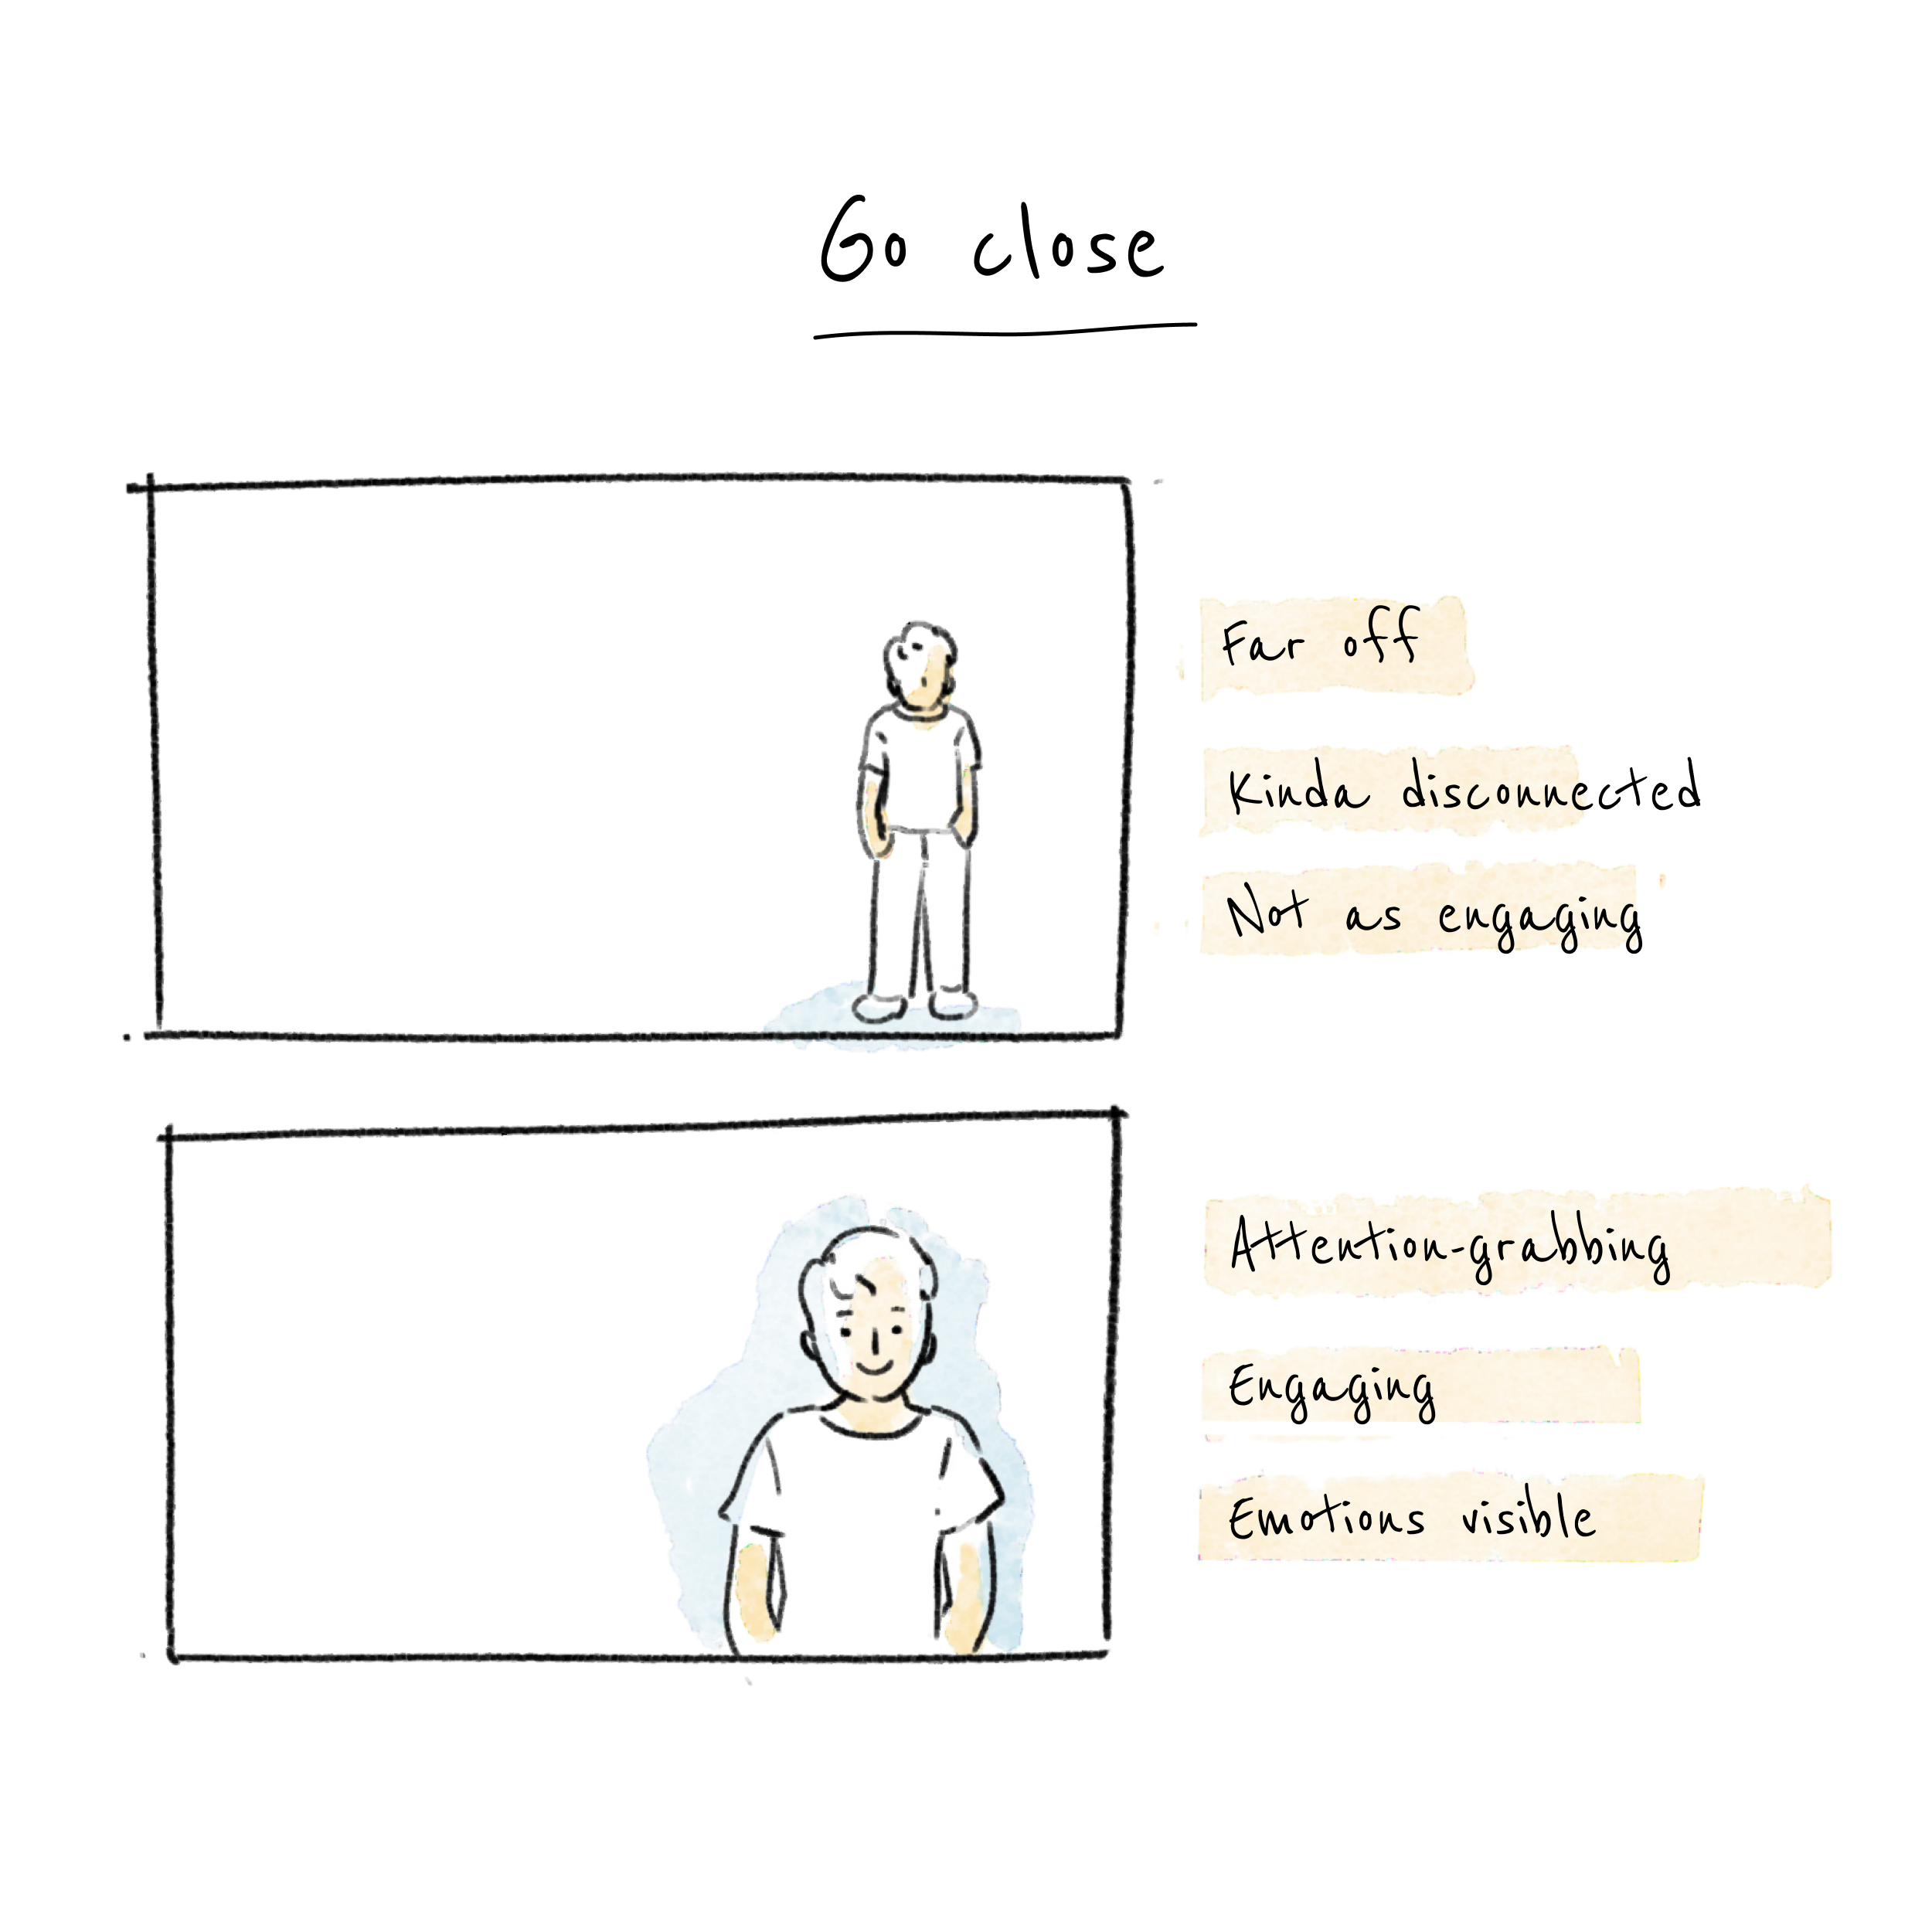
Go Close
Take more close-up shots. Going closer not only reduces the background area (which means less clutter) but also produces a more engaging photo where you can see your subject's expressions and feel their emotions.
Rule of Thirds
Divide the frame (mentally) into three equal parts vertically and horizontally, and place your subject at one of the four intersecting points. This can create a more interesting look than if you just center your subject.
Watch out for Protruding Objects
When shooting people, look out for protruding objects. Trees or poles can appear to extend out from your subject's head and make them look unintentionally weird.
Recipe for Landscapes
View your scene as three layers: background, middle-ground, and foreground. For example, if you’re at a beach, the sky is your background, the water is your middle-ground, and the sand is your foreground.
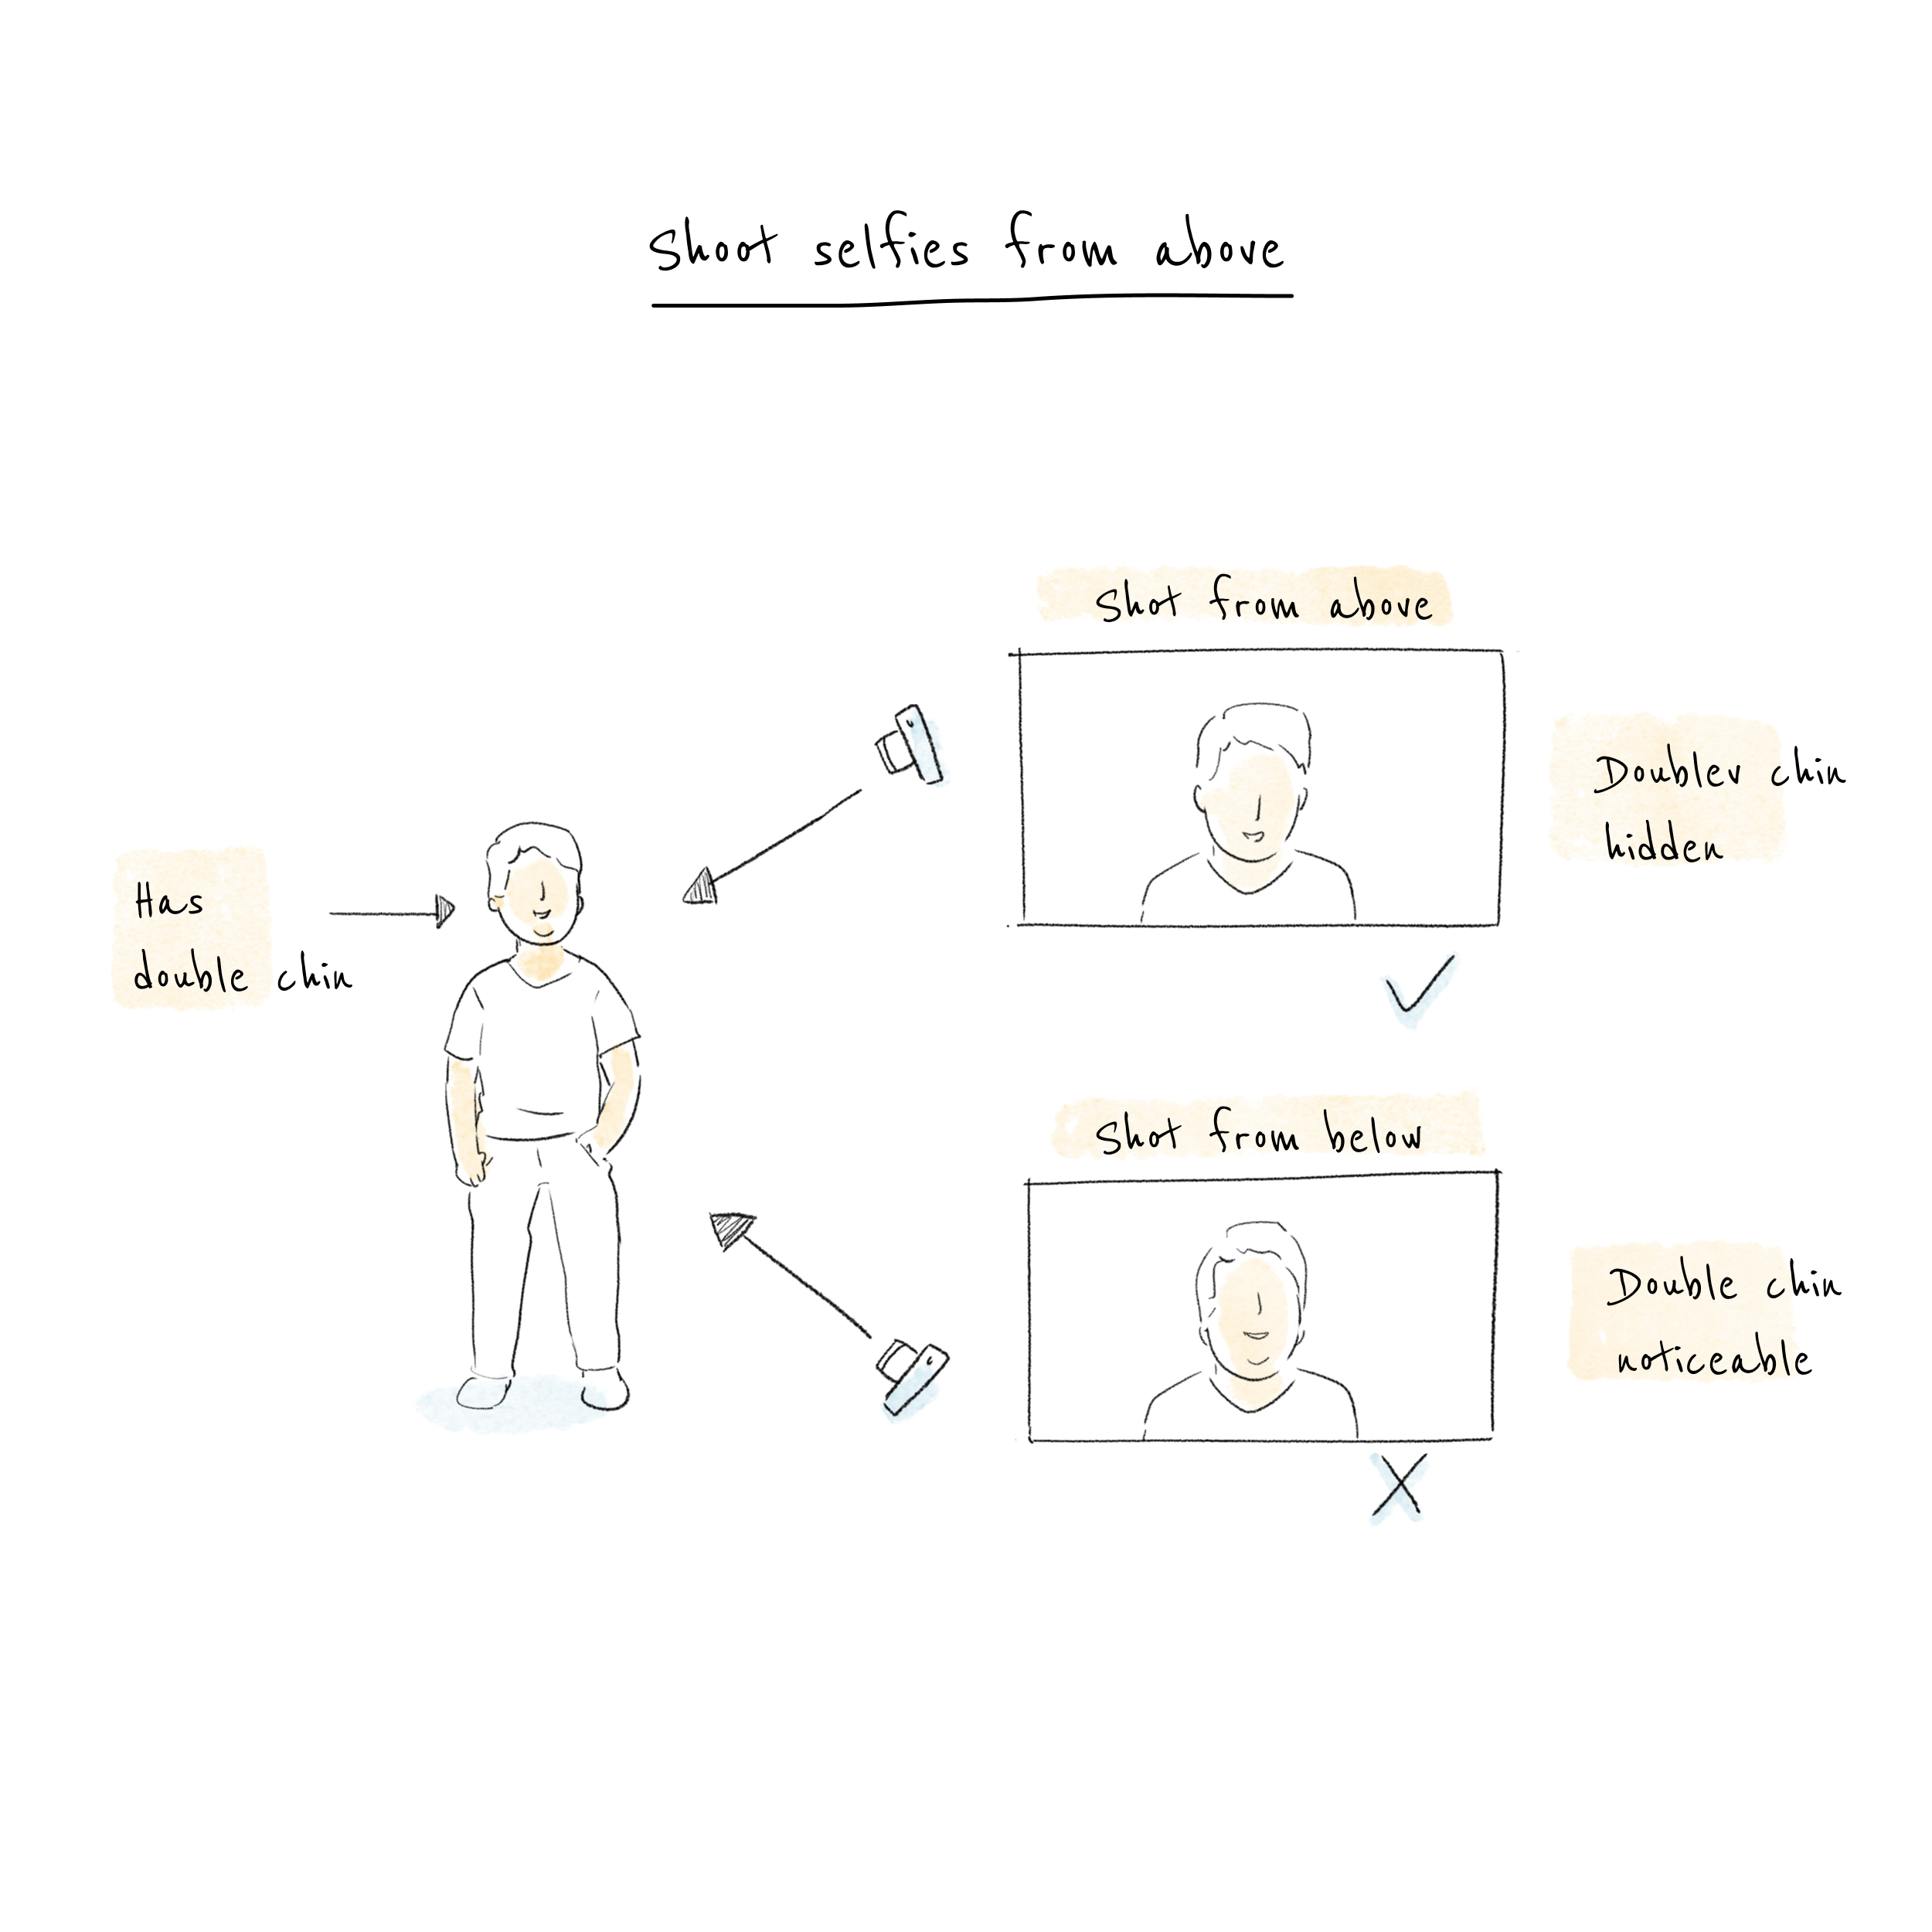
Shoot Selfies from Above
Shoot selfies from above, if you want to look your best. This also applies if you're shooting a close-up (face only) shot of someone else.
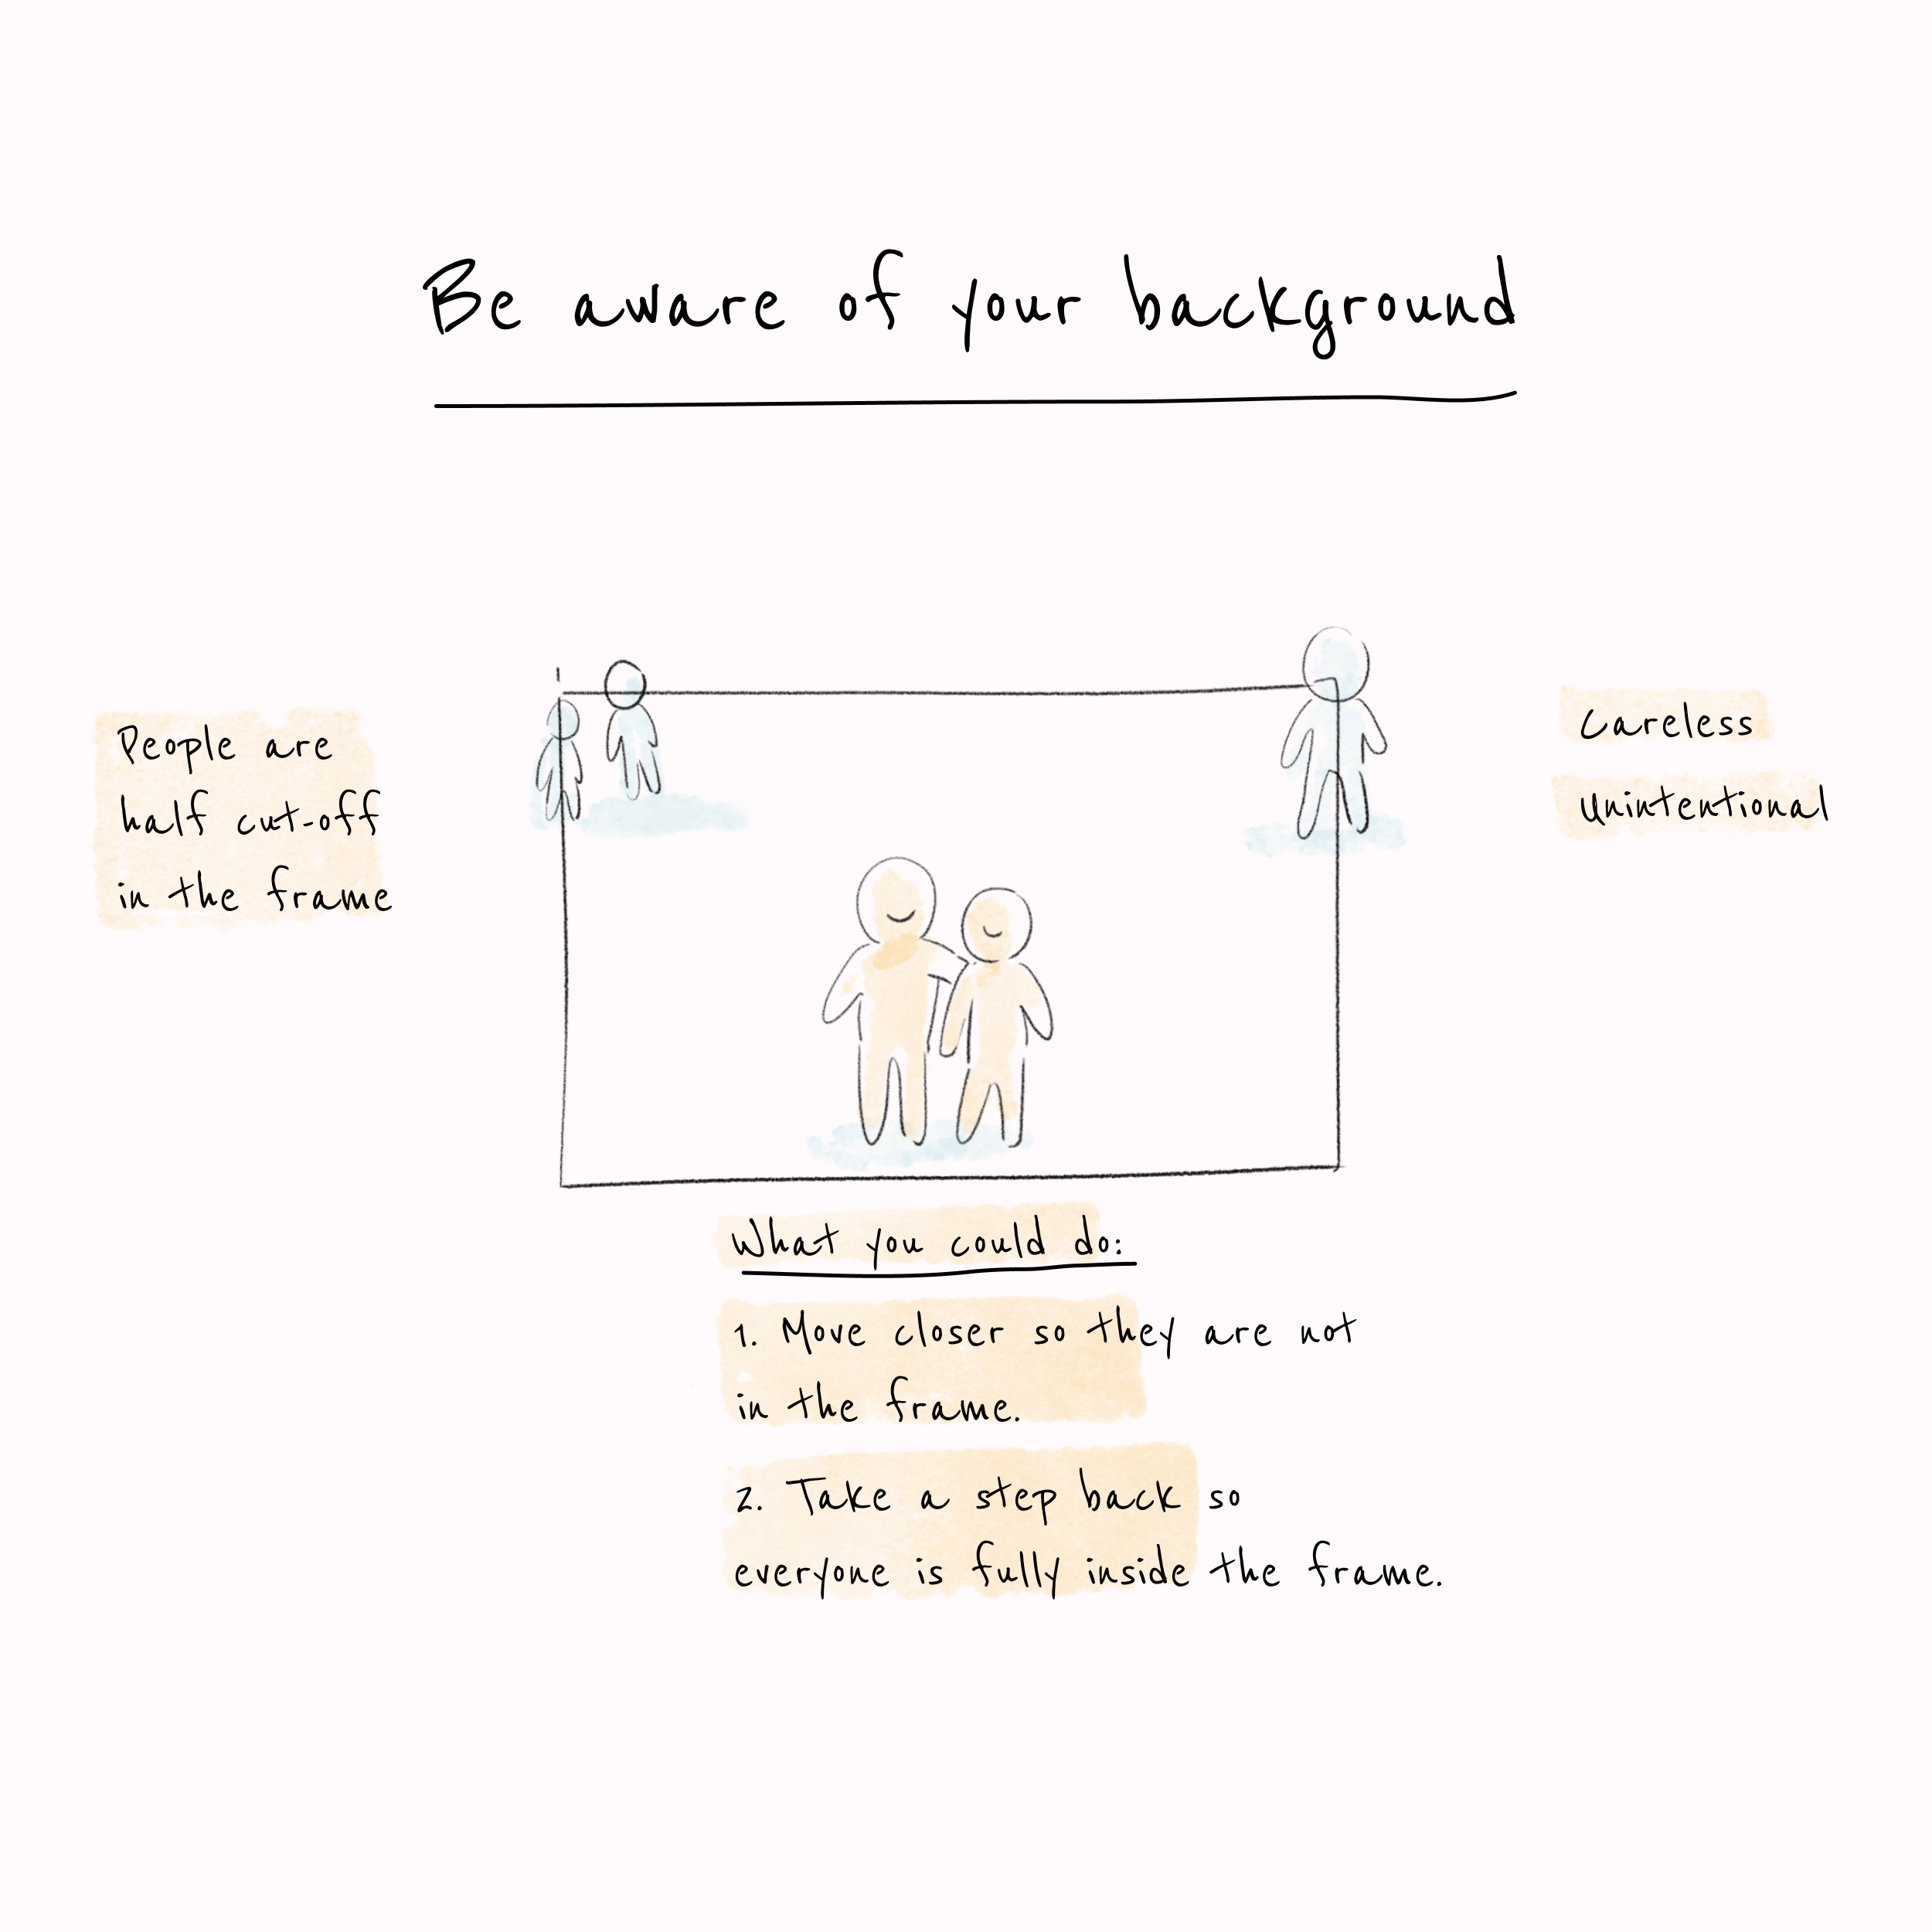
Be Aware of your Background
Before you take a shot, make sure there are no random people moving about in the background. Having people partially cut off in your frame makes it look cluttered and distracting, and you'll come across as a careless photographer.
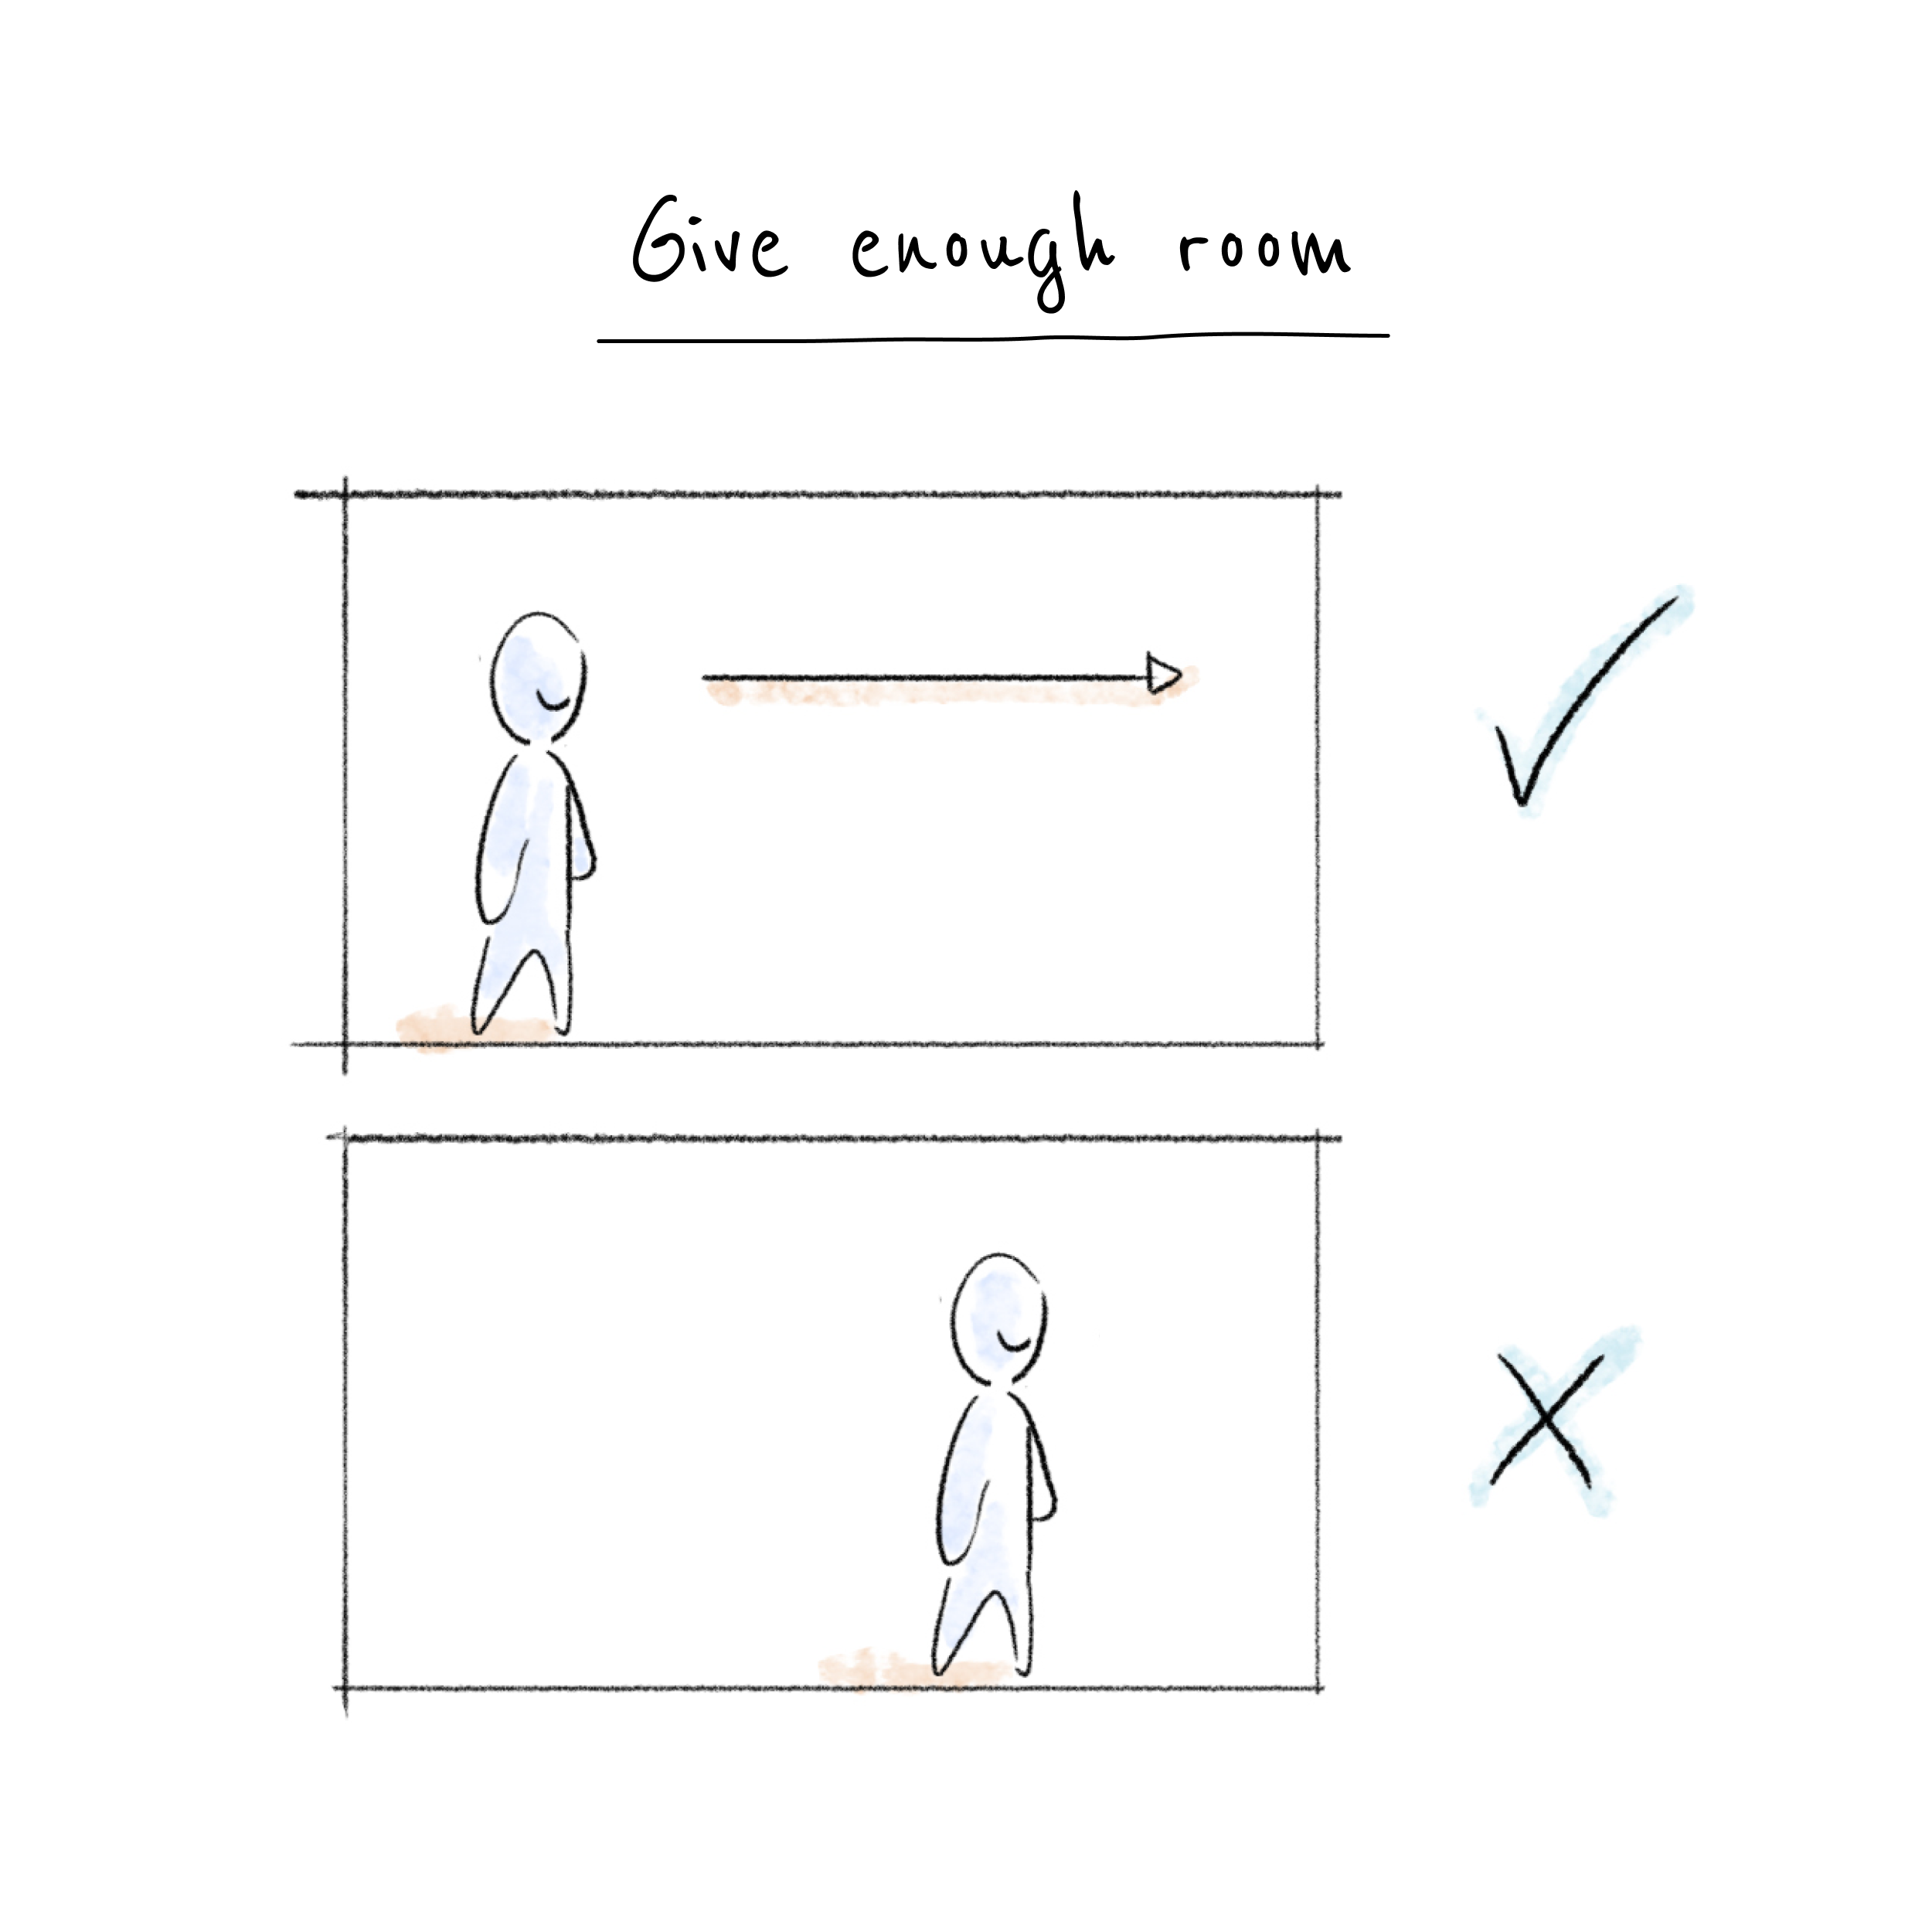
Give Enough Room
Position your subject so there is ample room in the "line of sight". For example, if they are facing right, place them on the left. If you place them too close to the wrong edge, it would trigger an uncomfortable feeling--almost like they are going to walk off the frame.