How to Shoot in Manual Mode
Is your camera always on Auto? Knowing how to use your camera manually unlocks more creative possibilities for you. Cameras have light sensors that detect how much light there is in your scene, and do a pretty good job at “averaging” the light and getting you a sharp, well-lit photo. But that’s the problem. All your photos will be just average :) Your camera doesn’t really know what you want. Maybe you want your image dark with just a bit of light shining on your subject. Or maybe you want their eyes sharp but everything else blurry. Or you’re shooting sports, and you want to capture the ball’s motion.
If you're using a DSLR or mirrorless camera in Auto mode, it's like driving a Ferrari in first gear.
To shoot manually, you need to learn the camera's language, so you can tell the camera what you want it to do. The three main elements of this language are aperture, shutter speed, and ISO. Once you understand these and how they work together, you can talk to the camera. So, let's learn this language.
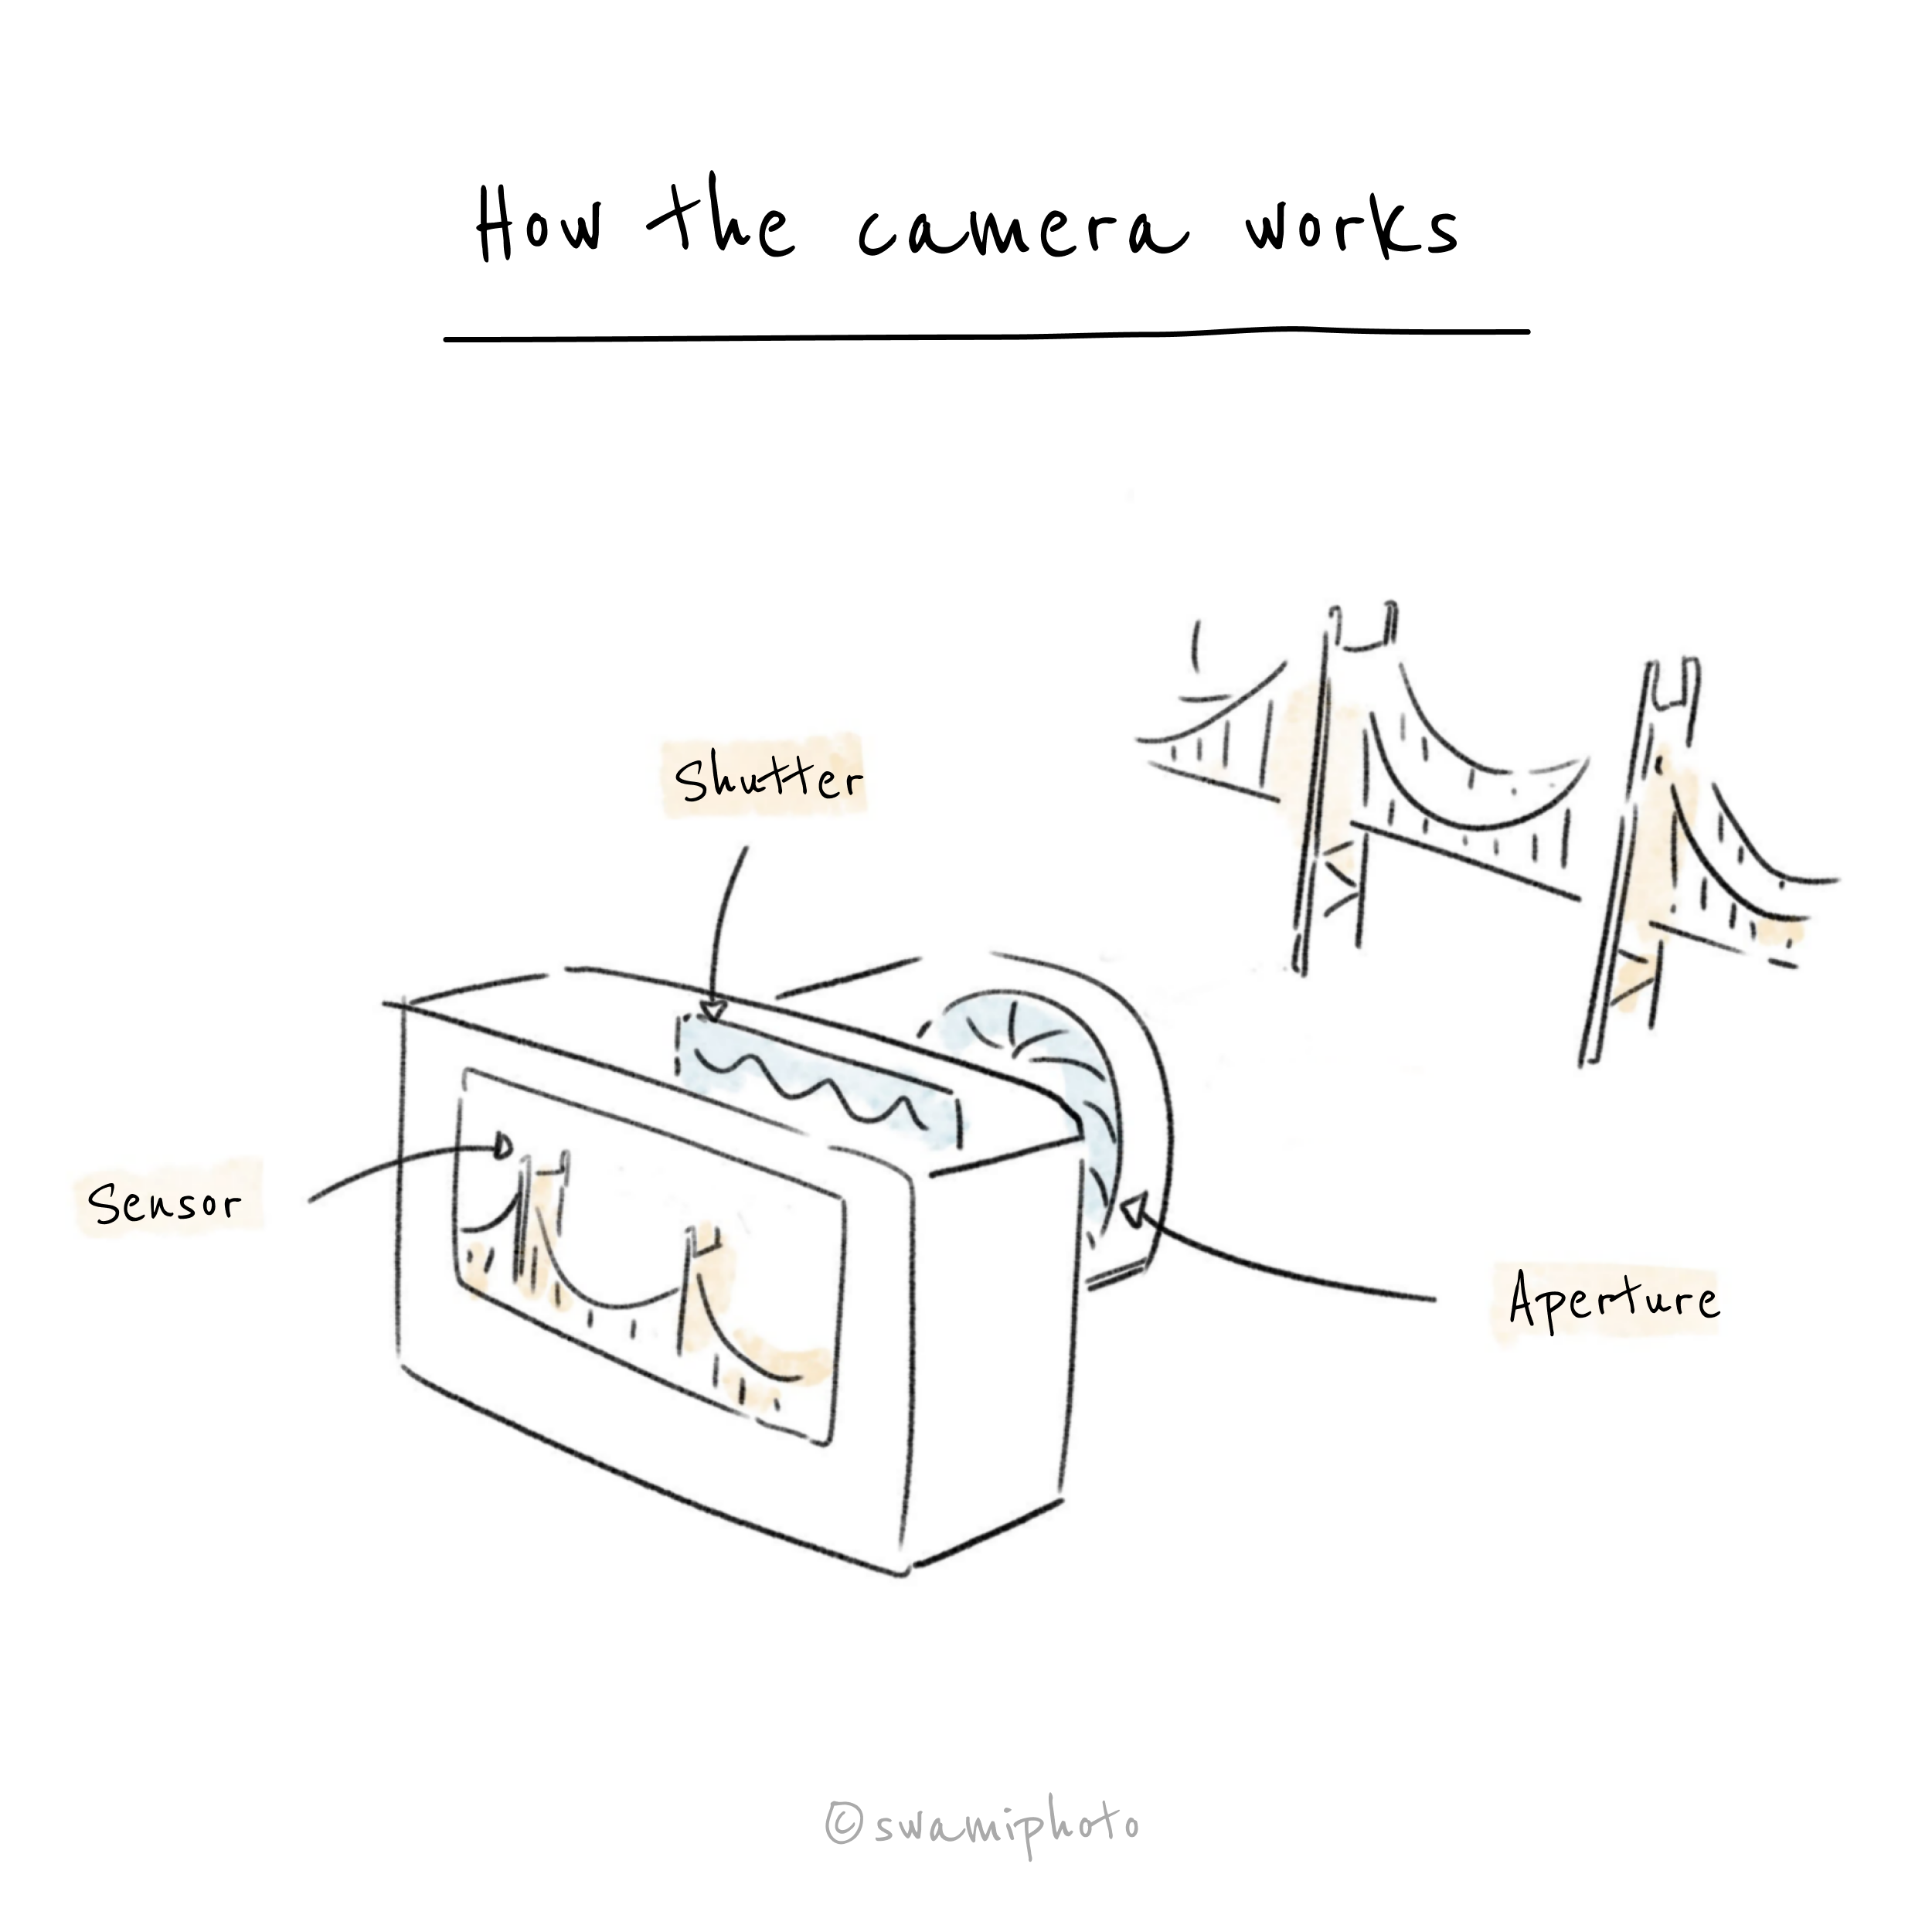
Light goes into your camera, through the aperture and shutter, and ultimately hits the sensor. The aperture is essentially a hole, which you can make larger or smaller. The shutter is like a curtain that opens and closes. You can control how long it stays open. The sensor is a digital panel that reacts to the light it receives, and the chemistry of that results in your image.
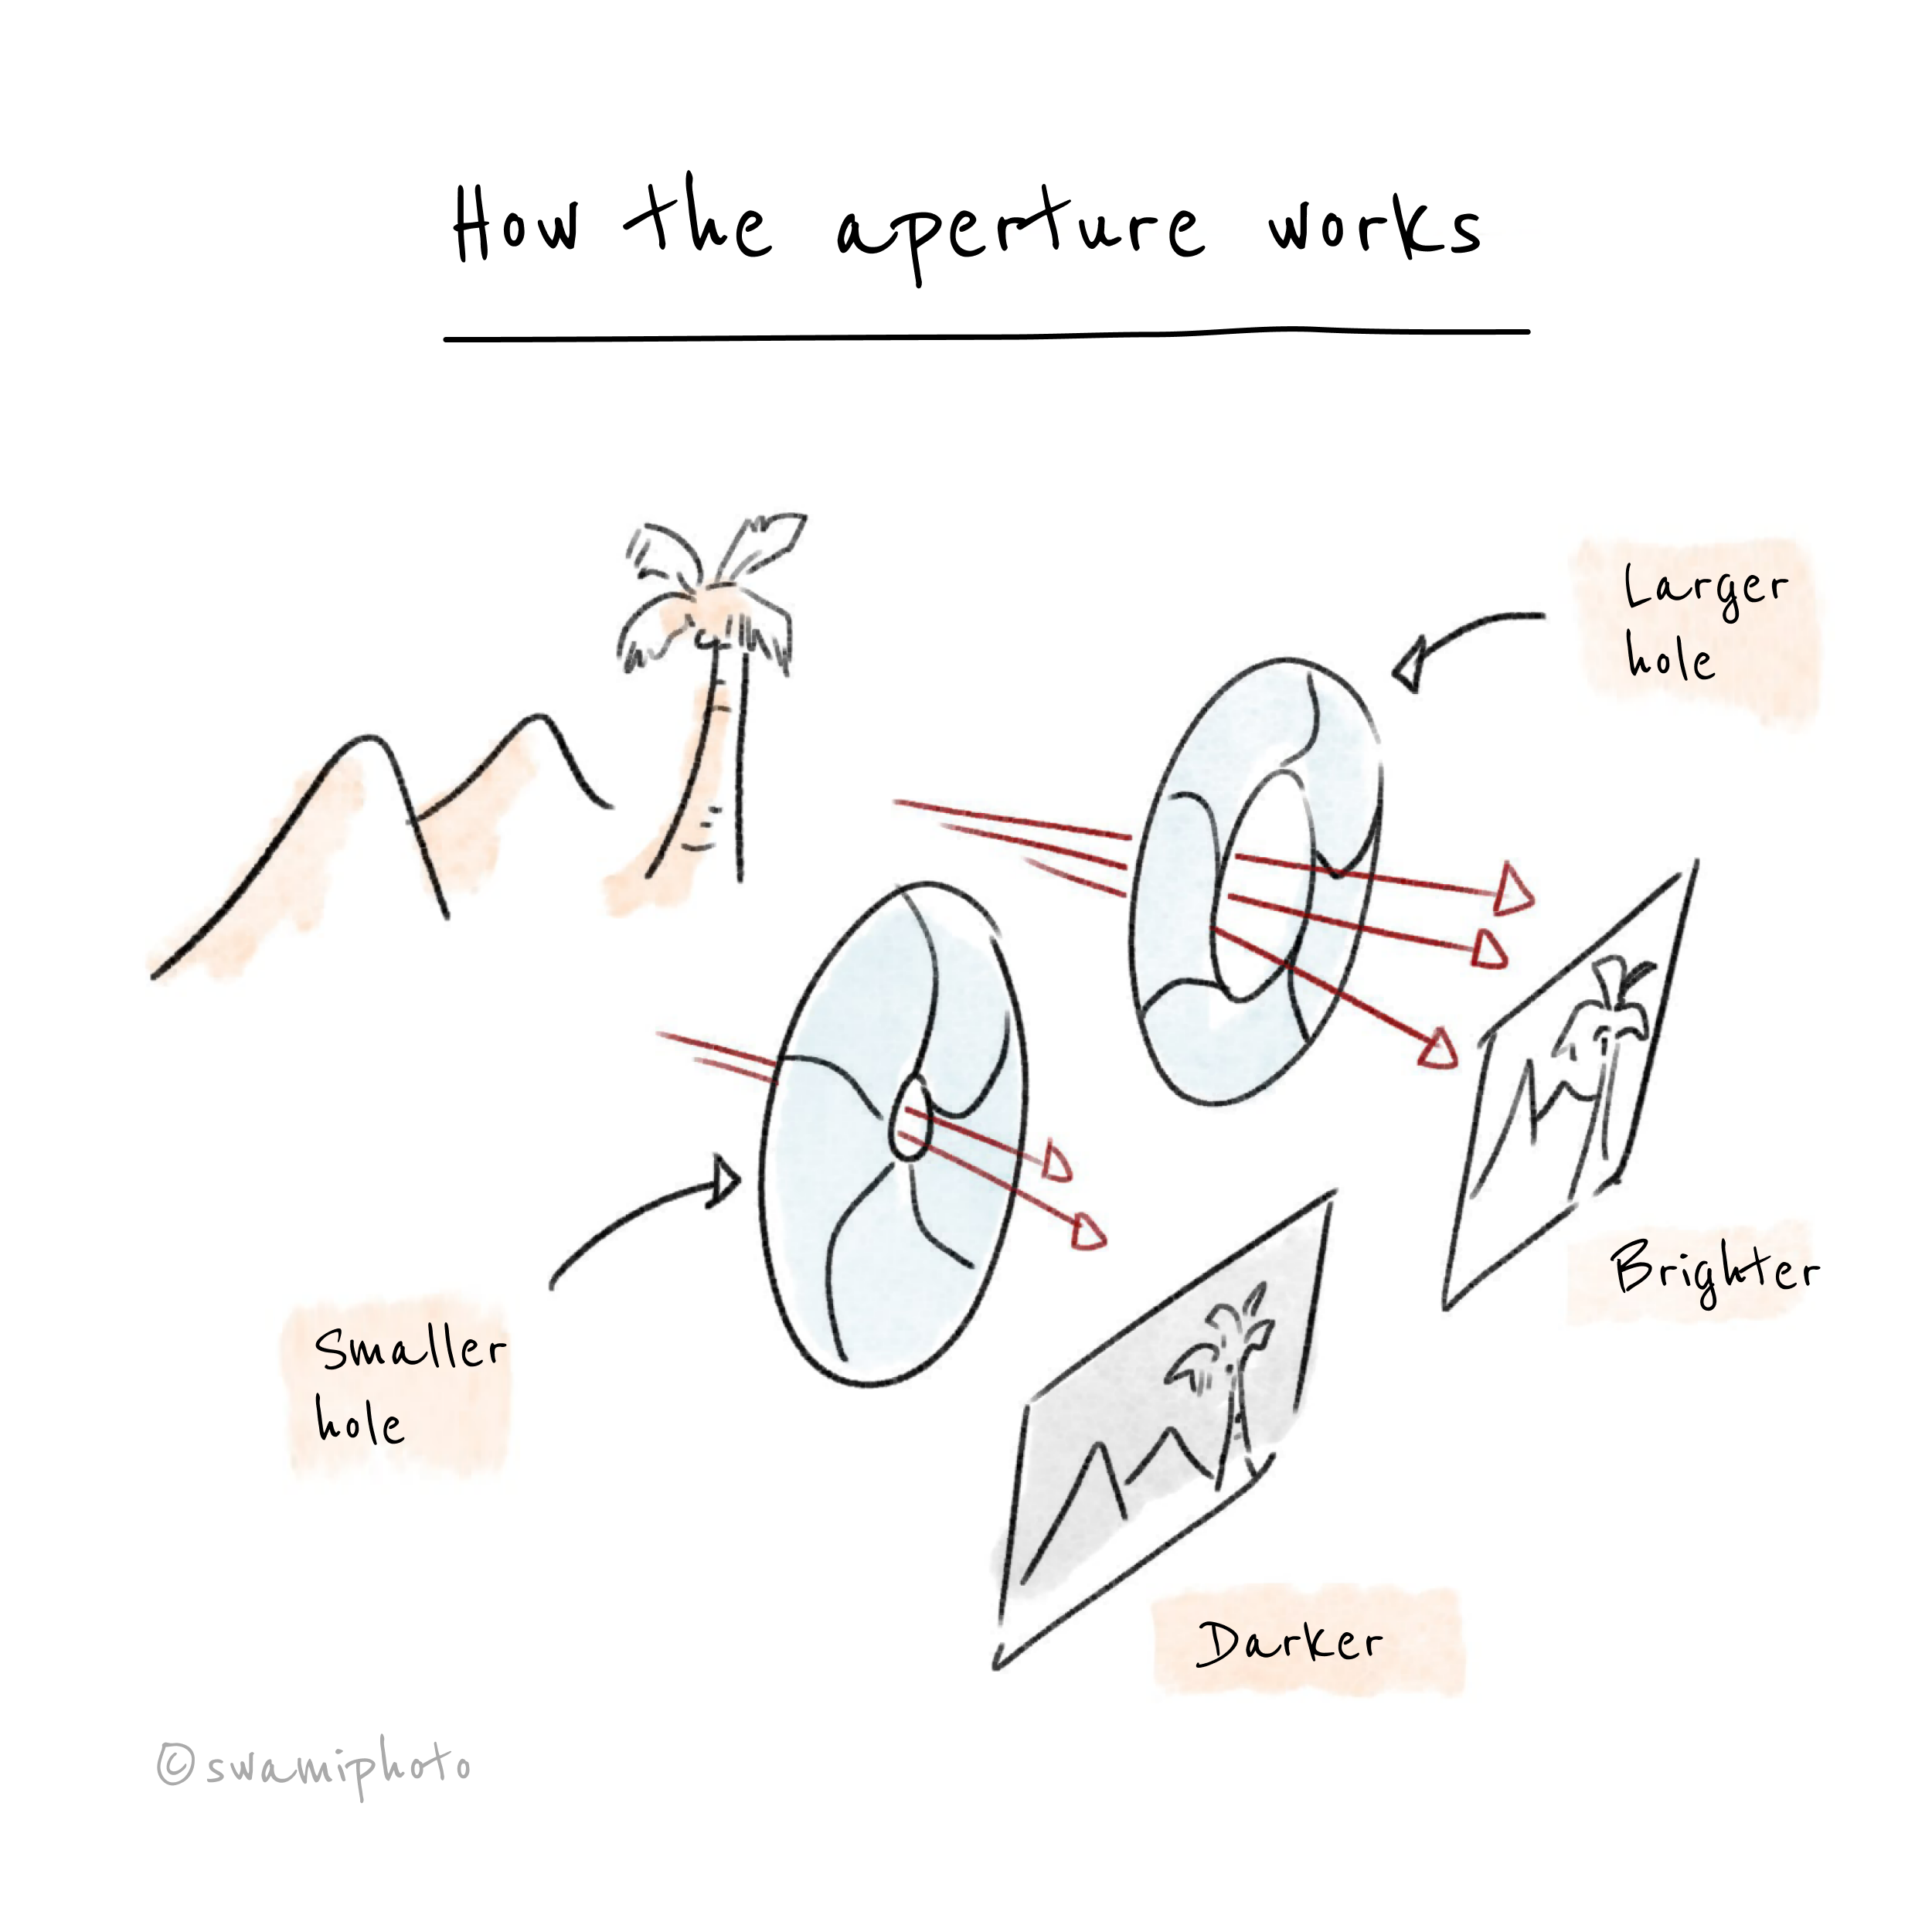
Aperture is just a fancy way of saying "hole." The lens has a hole in it so light can pass through. You can make the hole larger or smaller depending on your needs. For instance, if you're in a dark environment, you can make the hole larger so more light can enter. If you are outdoors on a bright day, make the hole smaller to prevent too much light from getting in. That's it really: a larger aperture gets you a brighter image.
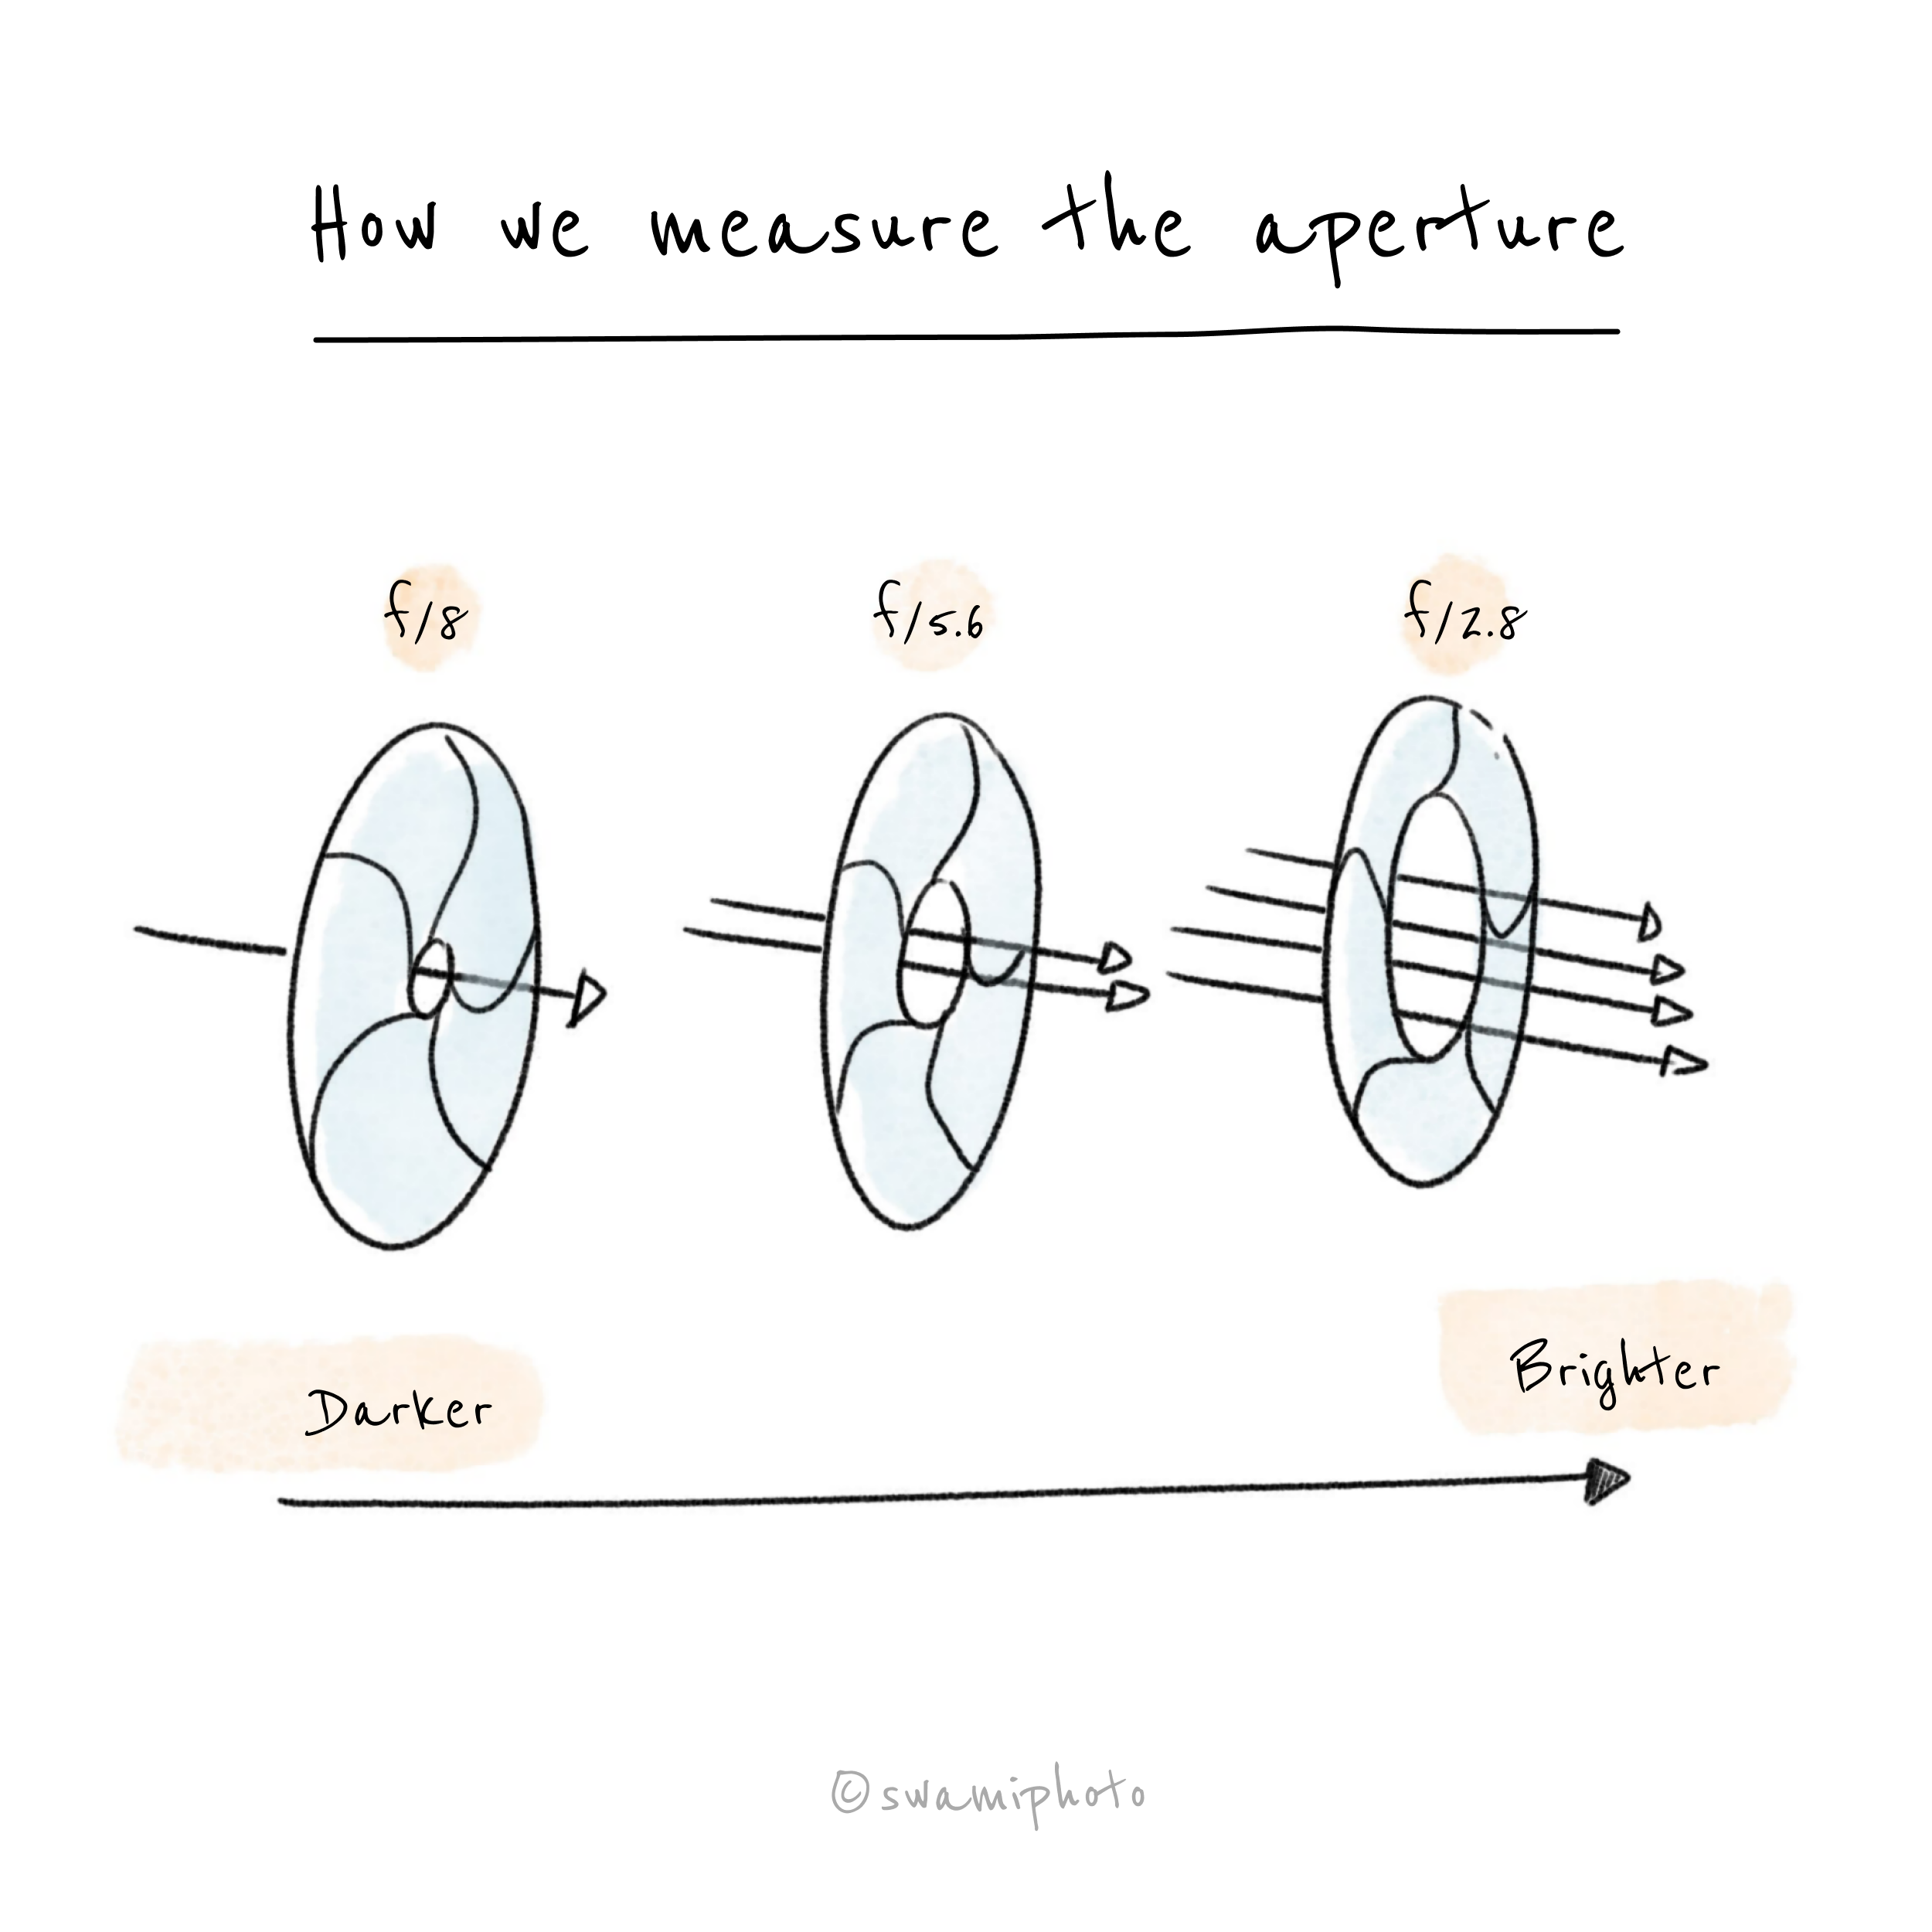
Just as we measure weight in lbs or kgs, we also need a unit for the aperture--so, whatever camera you use, you'll know exactly how bright or dark the image will be when you change the aperture size. The unit for aperture is called f-stop. We write it as a fraction with the letter f on the top and a number at the bottom (example: f/4). Whoever came up with this didn't care for simplicity, but all we care about is the number. Just keep in mind the number is a denominator, so a larger number means a smaller aperture. Lenses come with a fixed set of f-numbers that you can set (f/2.8, f/4, f/5.6, up to f/22). So, for instance, if you are in a dark place, you need a large aperture (to let more light in), so choose a small f-number.

The shutter is a curtain that's always closed. When you click the shutter button, the curtain opens for a bit to let the light in, and then closes again. You can control how long it stays open. The longer it's open, the brighter your image.Take note: both the aperture and shutter control how much light comes in. The only difference is the aperture can change its size, and the shutter can change the duration it's open.
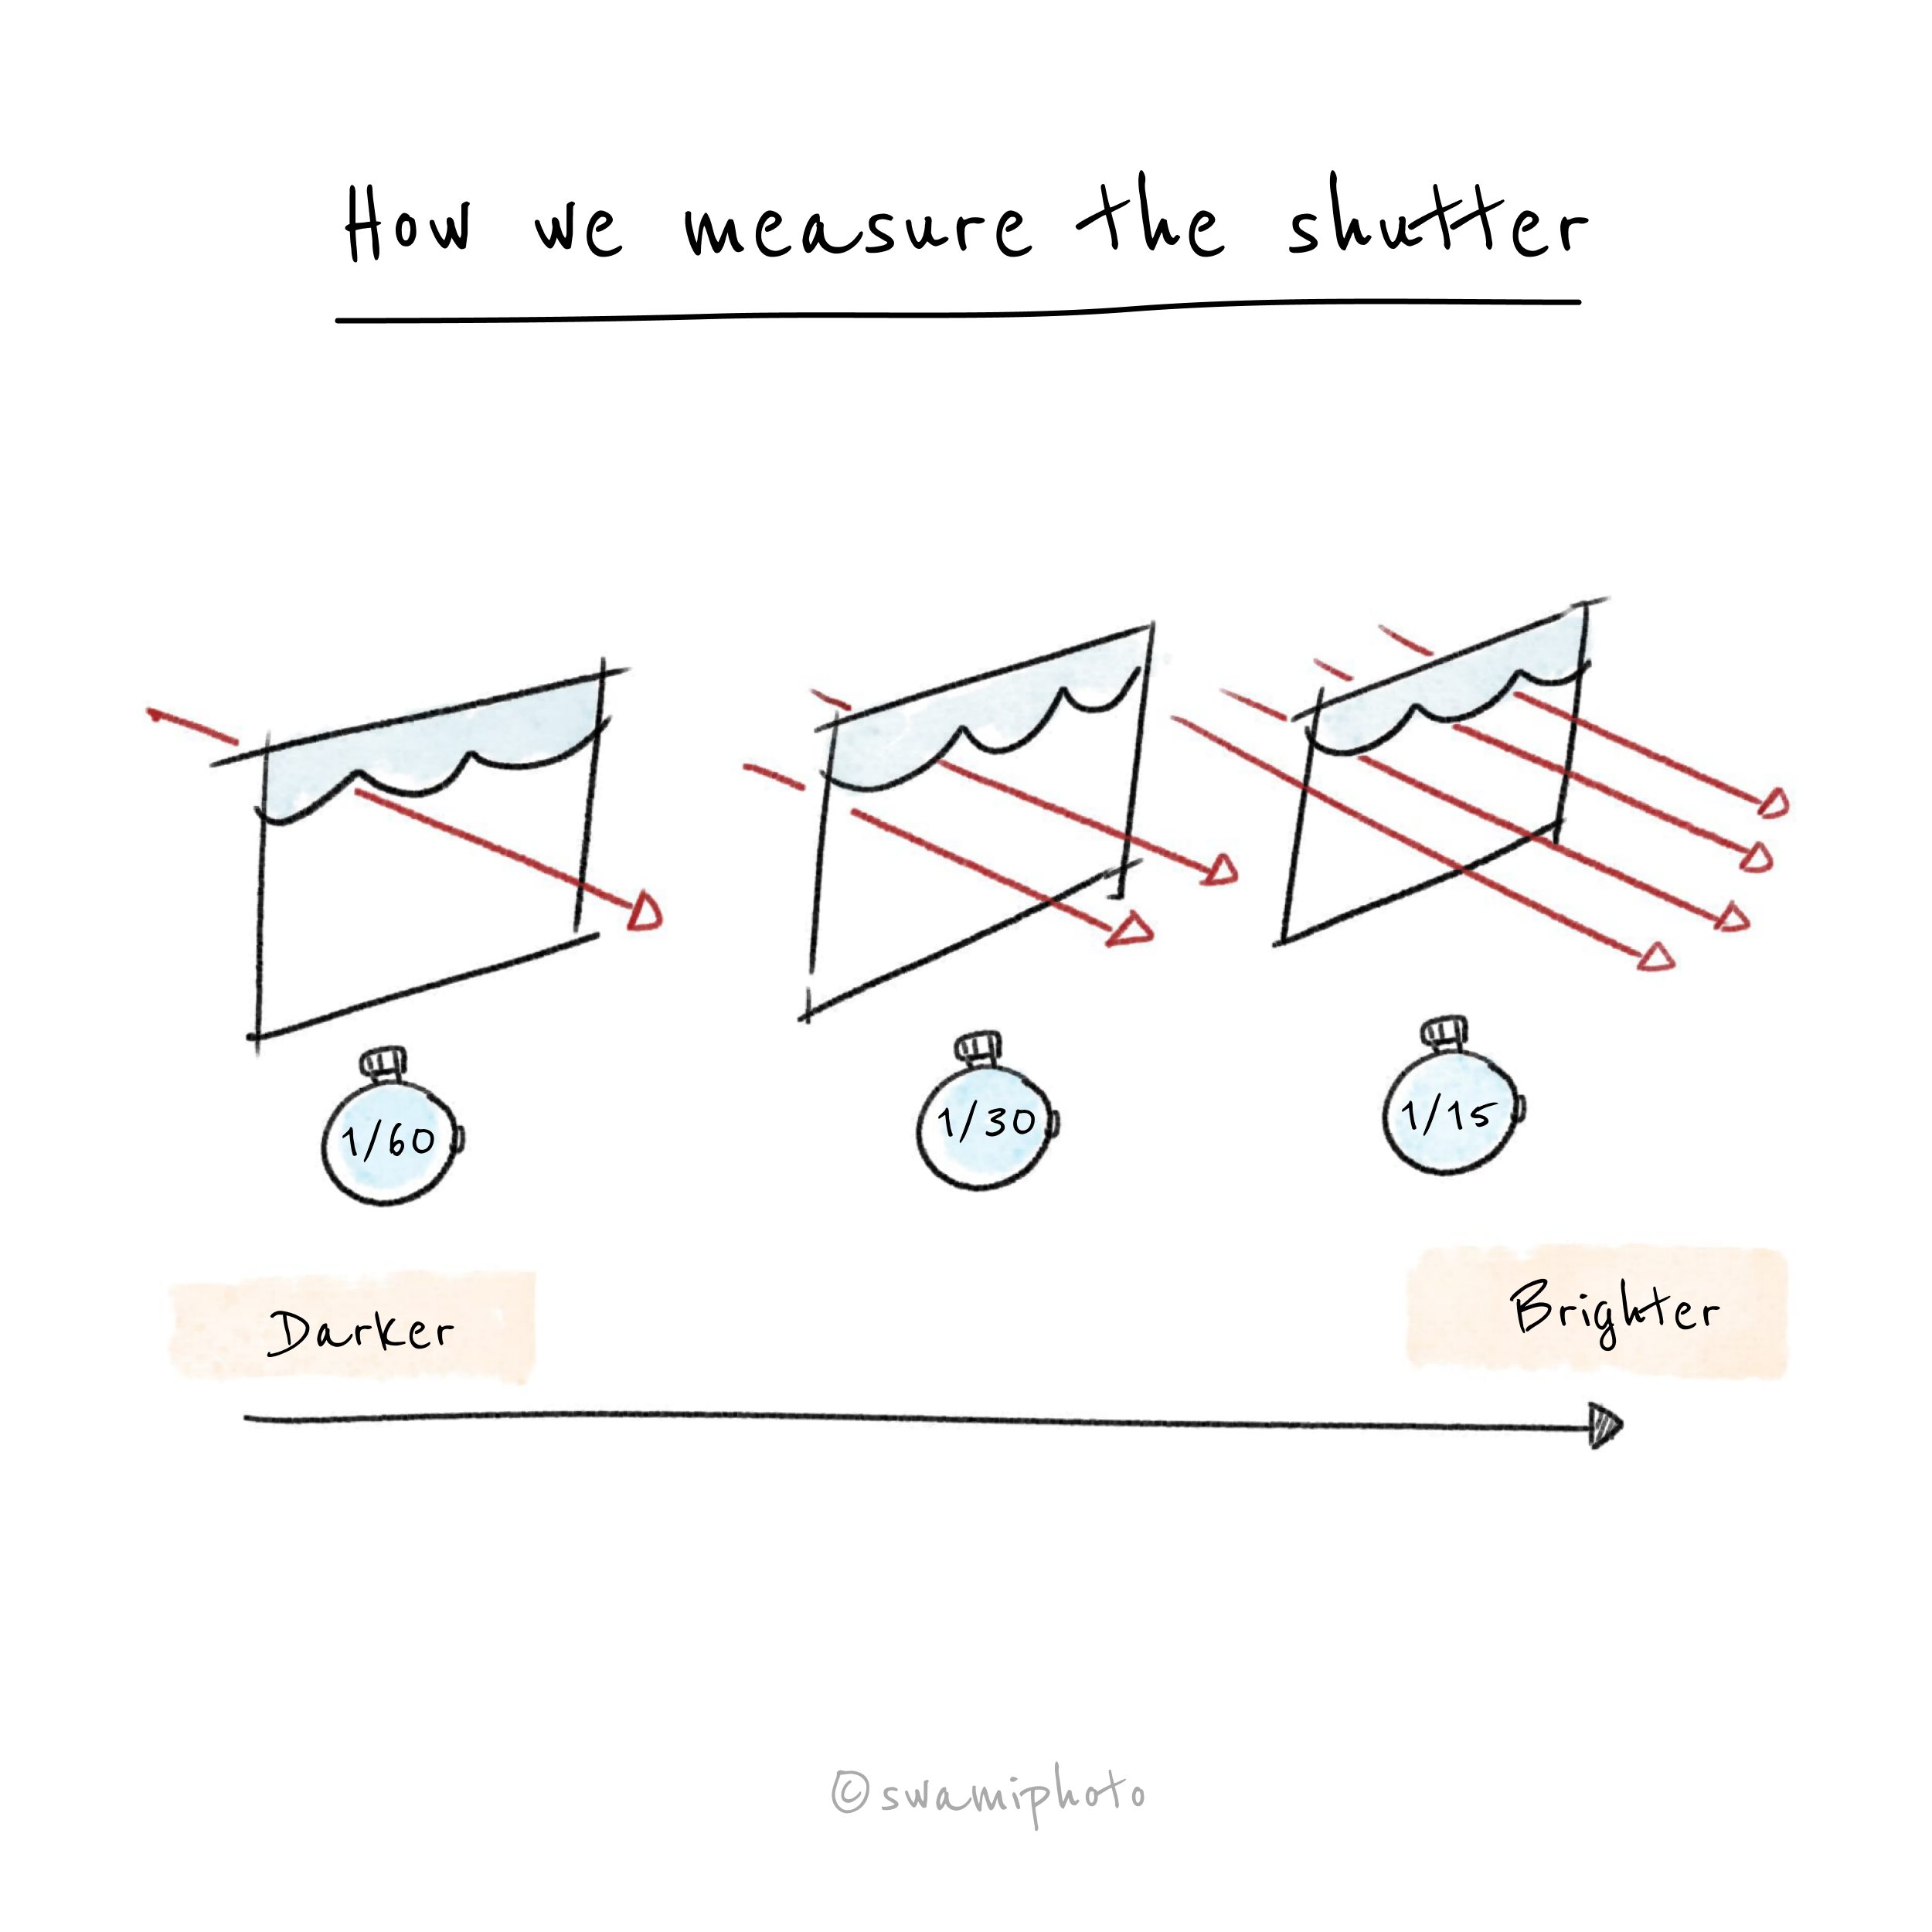
The shutter is a curtain that opens and then closes after a bit. The longer it's open, the more light that goes through, but we need to know precisely how long it's open, so we have a unit for it: shutter speed. Though it's called shutter speed, it's really a duration, and so it's measured in seconds. You'll typically see fractions like 1/60 or 1/30, but you can set longer durations, even 30 seconds or more if you want your photo brighter.
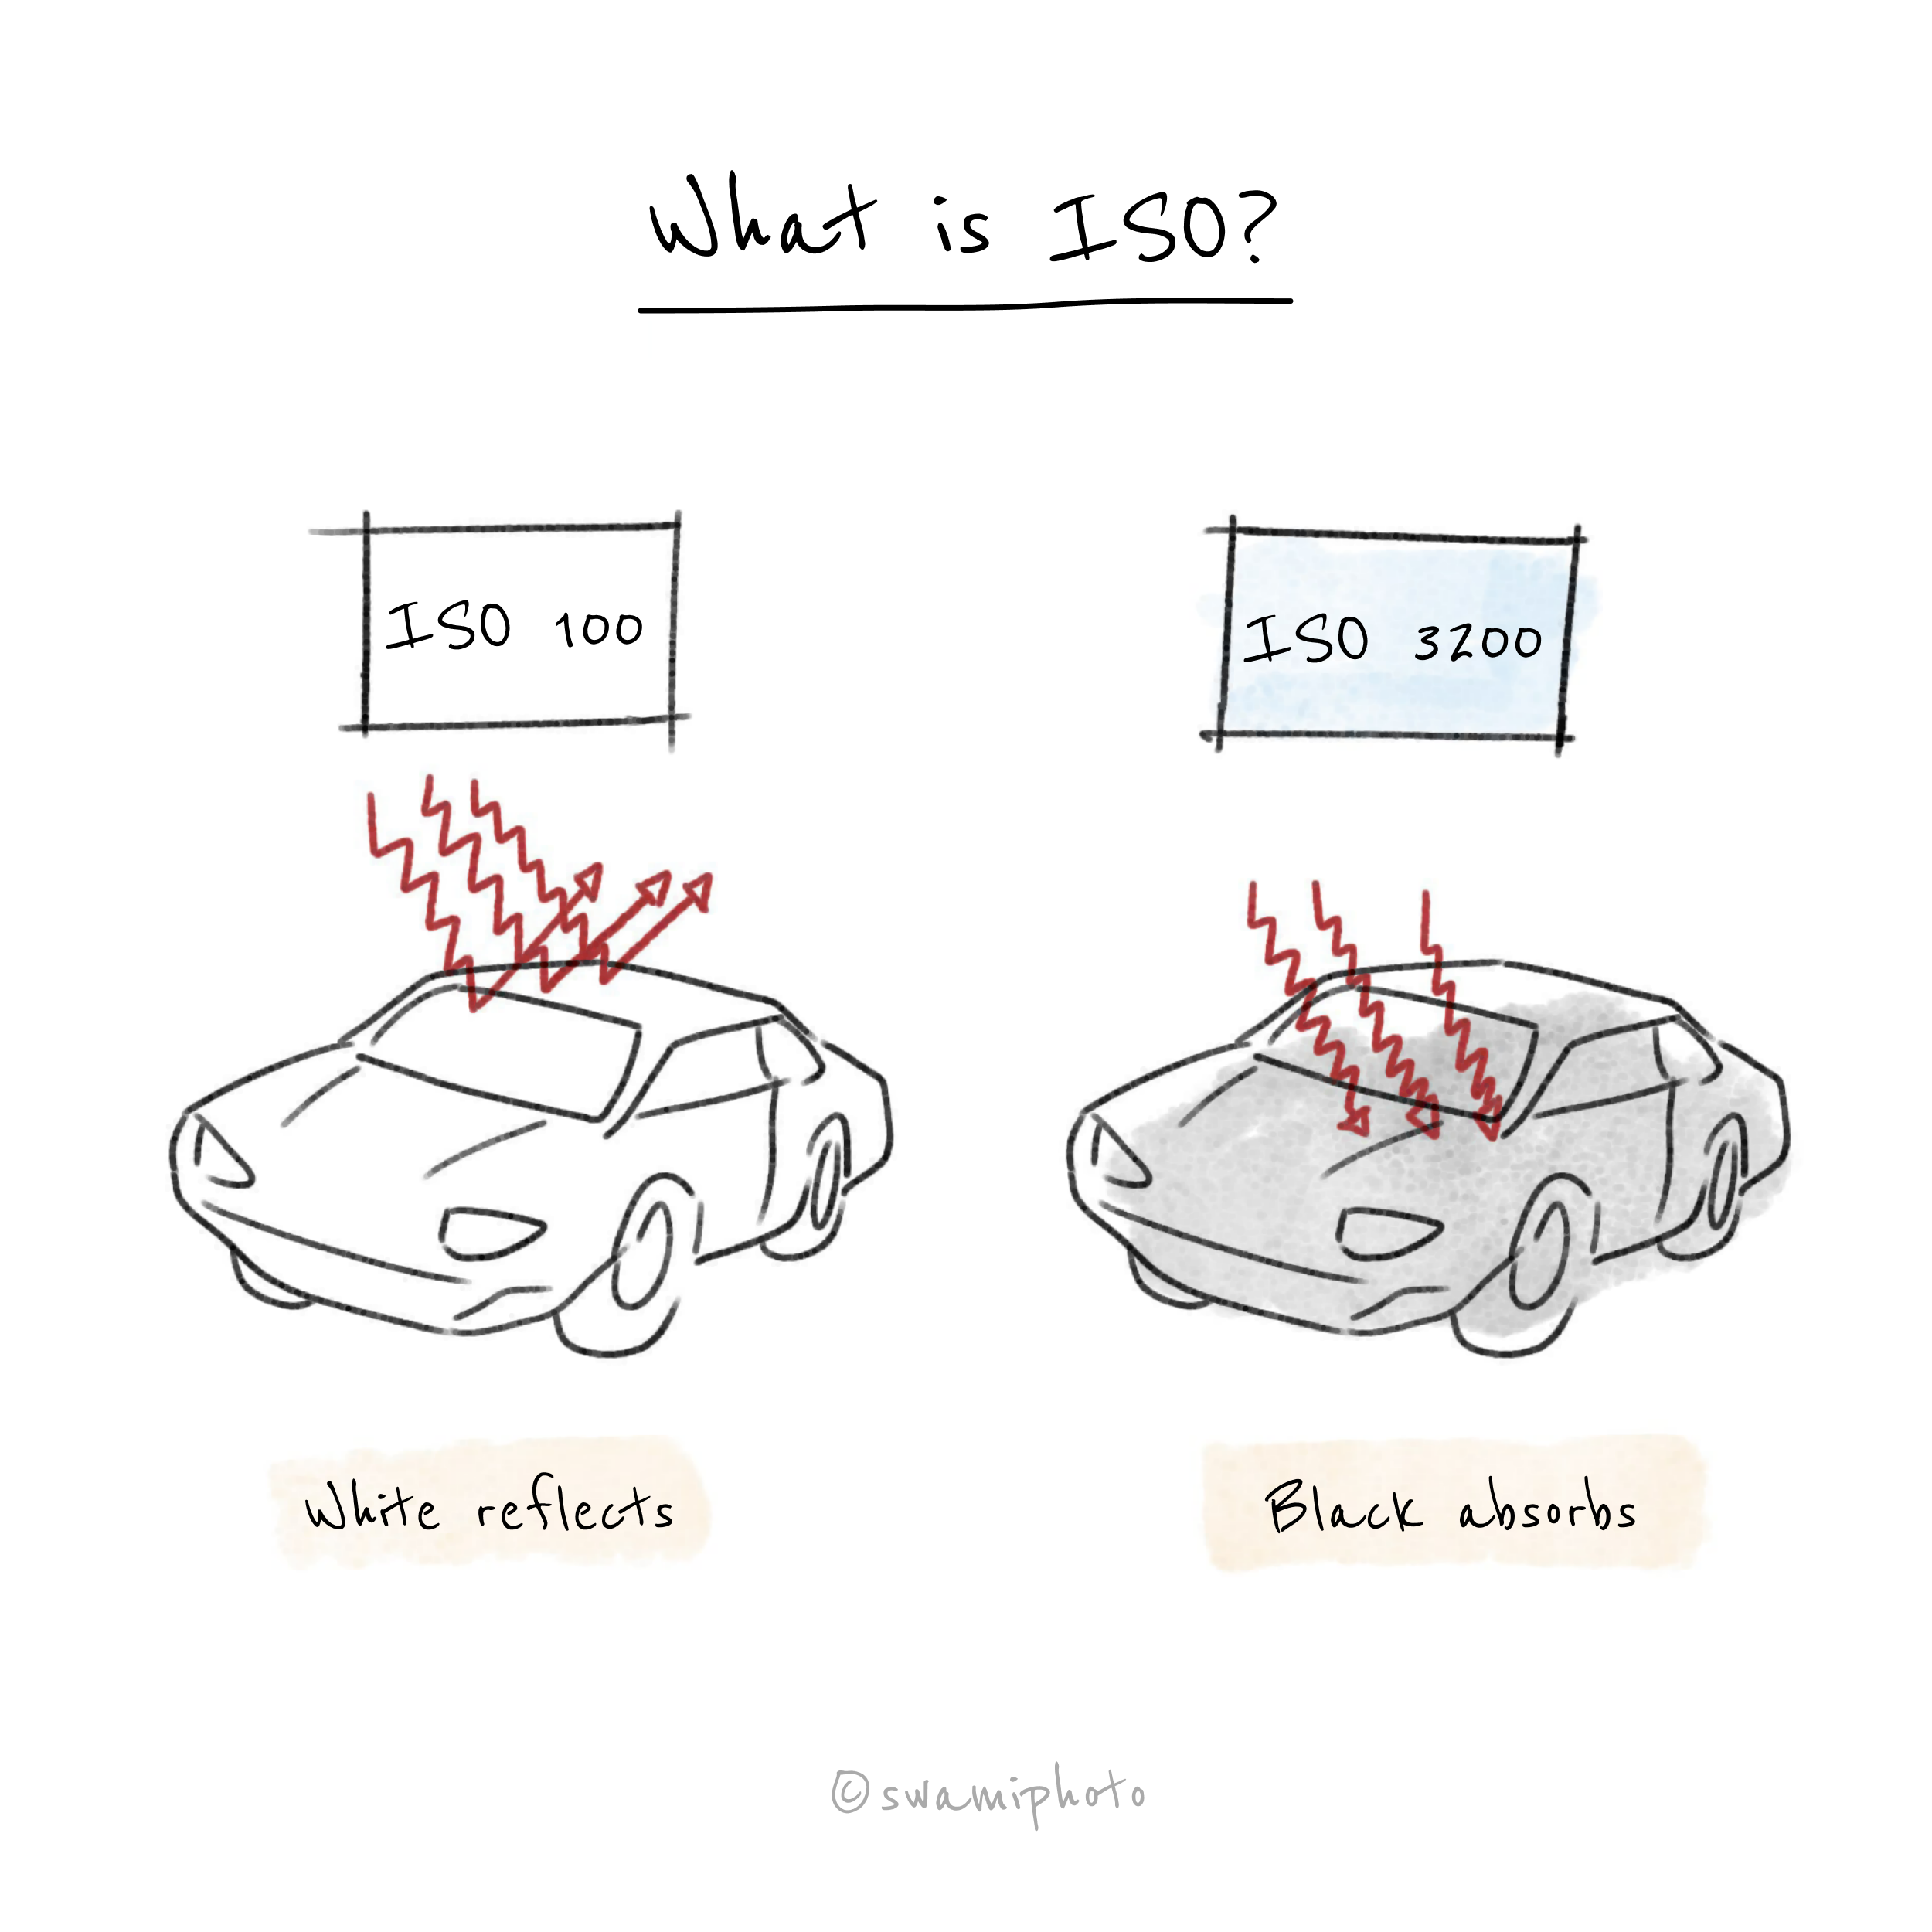
The aperture and shutter let light in (and you can change the aperture size or the shutter duration to control how much light you want in), but when the light ultimately reaches the sensor, the sensor decides how much of this light it wants to soak in. Kinda like how darker colors absorb more heat than lighter colors--given the same temperature, a black car would get warmer than a white car. In the camera, we call this ISO. When you increase the ISO, the sensor becomes more sensitive to light, and your photo turns out brighter. So, ISO gives you a third way to control the brightness of your image.At this point, you may be wondering why we need three ways to control the brightness. Don't worry--we're going to get to that in a bit.
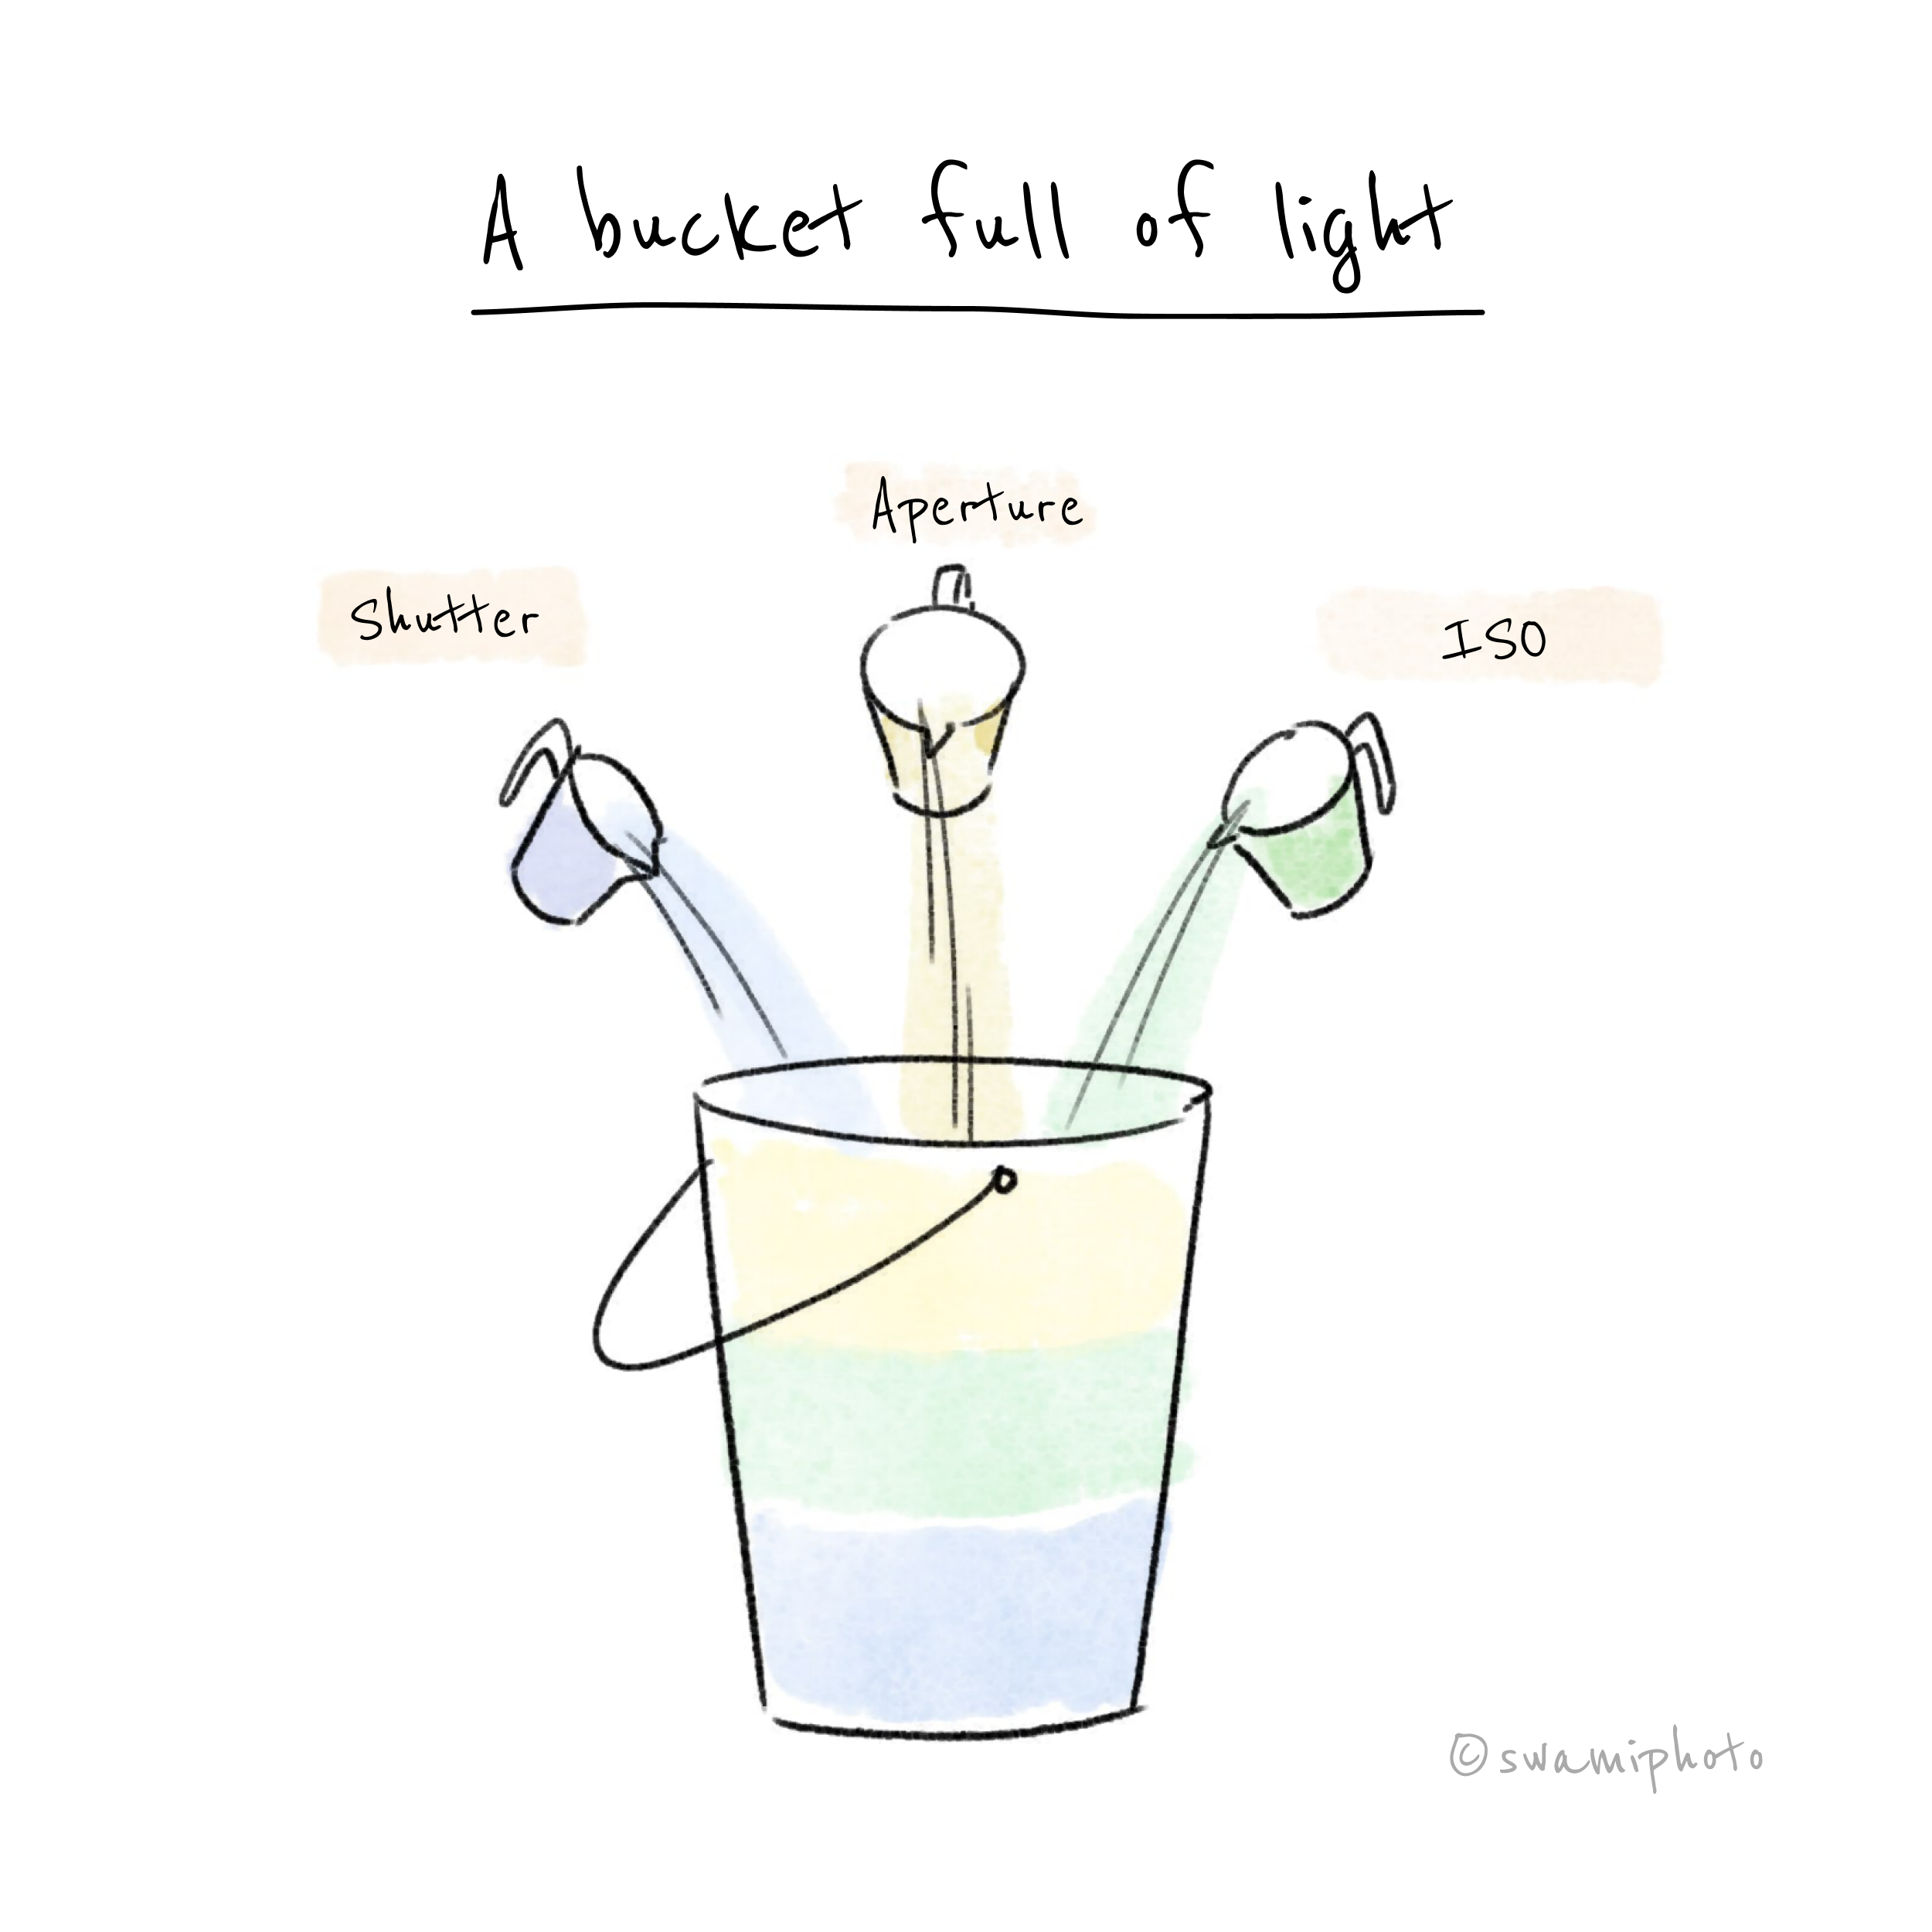
The camera needs a certain amount of light to create a perfectly exposed image--not too bright, not too dark. Your job is to ensure the camera gets the light it needs. Let's use a bucket analogy. Your camera needs a bucket of light, and you have three mugs to pour light with--aperture, shutter, and ISO. Their contributions don't have to be equal. What matters is that the bucket is full. If it’s not full, your image is too dark. If the bucket overflows, it's too bright. This is popularly known as the exposure triangle, but I find the bucket analogy easier to understand.
So, the question is: why do we need three ways to control light? If all three are doing the same thing, couldn’t we just do with one?